Stay On Top of Your Tasks: Build a TO-DO Application with Angular
Build an easy to-do app with Angular: Stay organized, boost productivity, and access it anywhere. Learn how in this step-by-step guide.

Whatever profession we might have, or any field we work in, we often find ourselves tangled in a number of tasks. Sometimes, it is just all too much to remember and we sometimes end up forgetting one while doing the other. I was once given a very old but very effective advice by my father “Write all the tasks on a paper when you start your day, list them according to their urgency and importance, and by the end of your day, it will be all done.” It has so far worked nicely for me but as I spend more and more time on the computer, I realize the practice needs some upgradation. I need something I can access from anywhere or on any device.
So, today, here we are, building a TO-DO application with angular. Angular is a development platform that is built on Typescript. Let’s get started.
How to build a to-do list application
This article will take you step by step through the process of building a to-do list app. First things first, we need to install Angular on our system. However, we need to have the following for that:
Prerequisites
1- Node.js: We need Node.js to work with Angular. You can run the following command to check if you have it already installed:
node -vIf you don’t have it, you can install Node.js.
2- The second thing we need is an npm package manager because different features and functions of Angular, Angular CLI as well as the Angular application depend on npm packages. You can run npm -v to check if you have it, as it is installed with Node.js.
Setting up the Application
Now we are going to install the Angular CLI by using the command:
npm install -g @angular/cliTo create our application we will write this command:
ng new todo --routing=false --style=cssWe would navigate to our project now with the command
cd todoNext, we have to run this application on the server by giving this command:
ng serveYou can now see your to-do application running locally at http://localhost:4200/
Structure of the to-do application
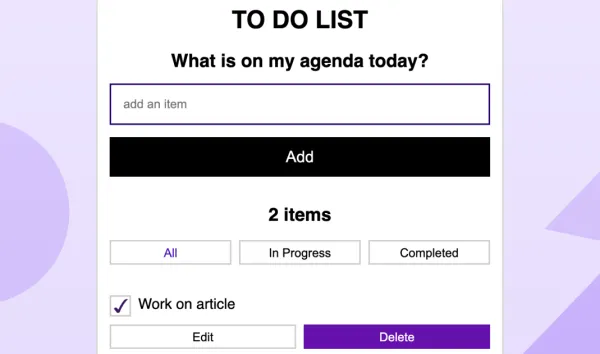
Now we will start adding logic to our application and we will be able to see the changes in real time. We are trying to create an application that allows us to add new tasks, tick off completed tasks, and delete the tasks we don’t want.
App.Component.ts is the file where all the logic for our application’s main page will be stored. Here is what the code looks like for that.
import { Component } from '@angular/core';
import { Item } from "./item";

@Component({
  selector: 'app-root',
  templateUrl: './app.component.html',
  styleUrls: ['./app.component.css']
})
export class AppComponent {
  title = 'todo';

  filter: "all" | "active" | "done" = "all";
  allItems = [
    {description: "Work on article", done: true },
    {description: "Send outreach emails", done: false},
    {description: "Post on socials", done: false},
    {description: "Create a content plan", done: true},
  ];

  get items() {
    if (this.filter=="all") {
      return this.allItems;
    }
    return this.allItems.filter((item)=>
    this.filter=="done" ? item.done:
    !item.done
    );
  }
  addItem(description: string) {
    this.allItems.unshift({
      description,
      done: false
    });
  }
  remove(item: Item) {
    this.allItems.splice(this.allItems.indexOf(item), 1);
  }
}
Here you can find the complete code for the to-do application.
Hosting Angular App on Codesphere
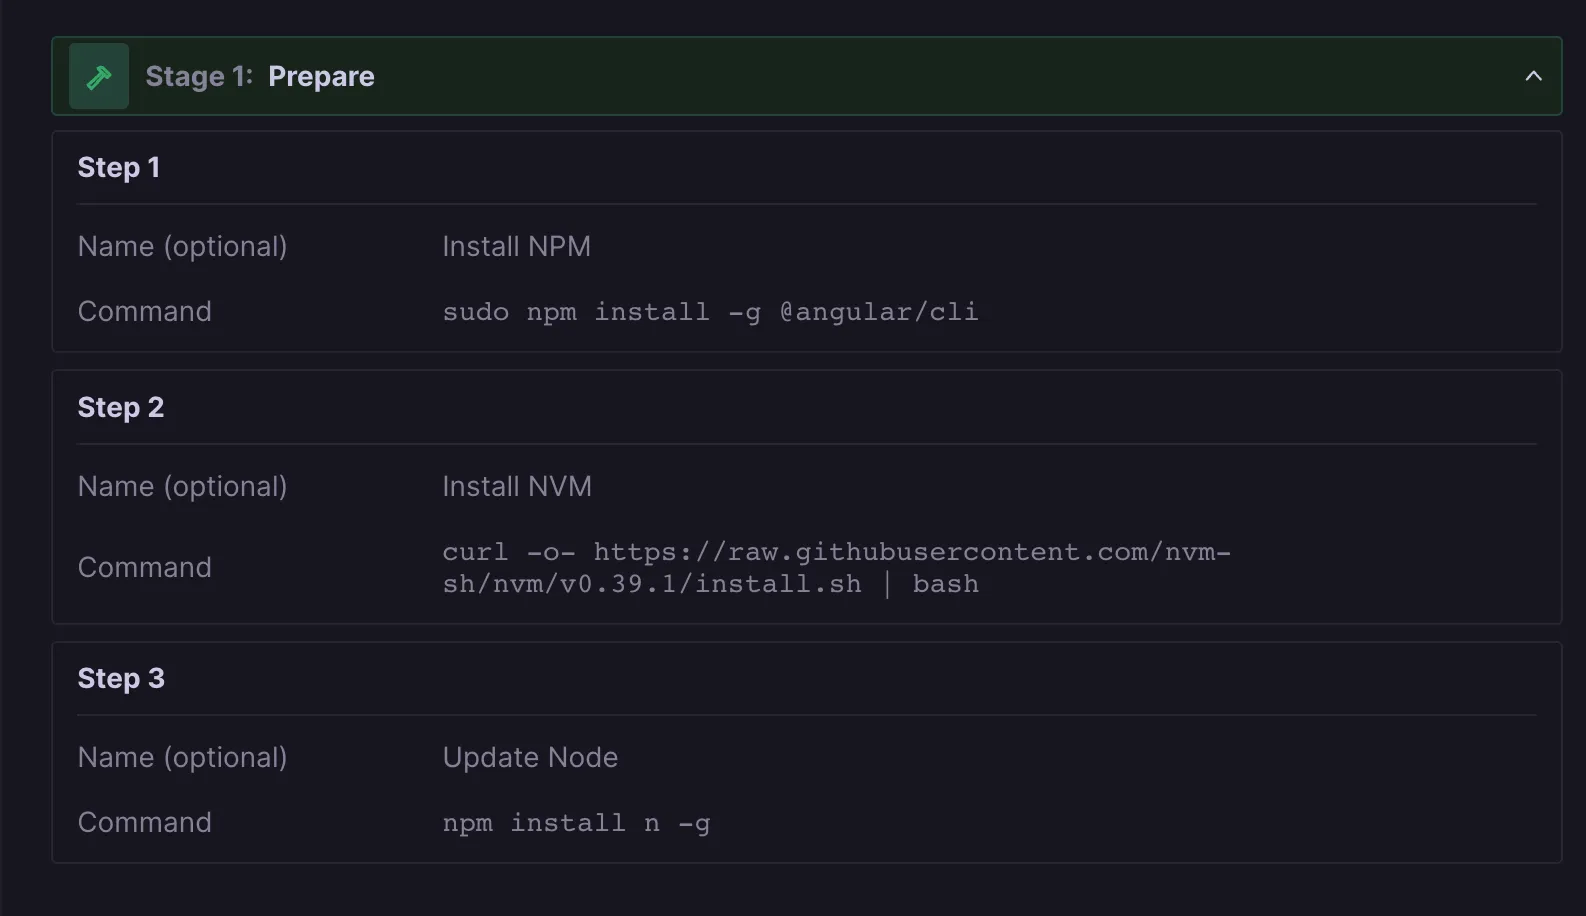
To host our application on codesphere we need to log in and create a workspace. We can directly import the code from GitHub. To run the application we will create a CI pipeline in a file named ci.yml. The “Prepare” stage will look like this:
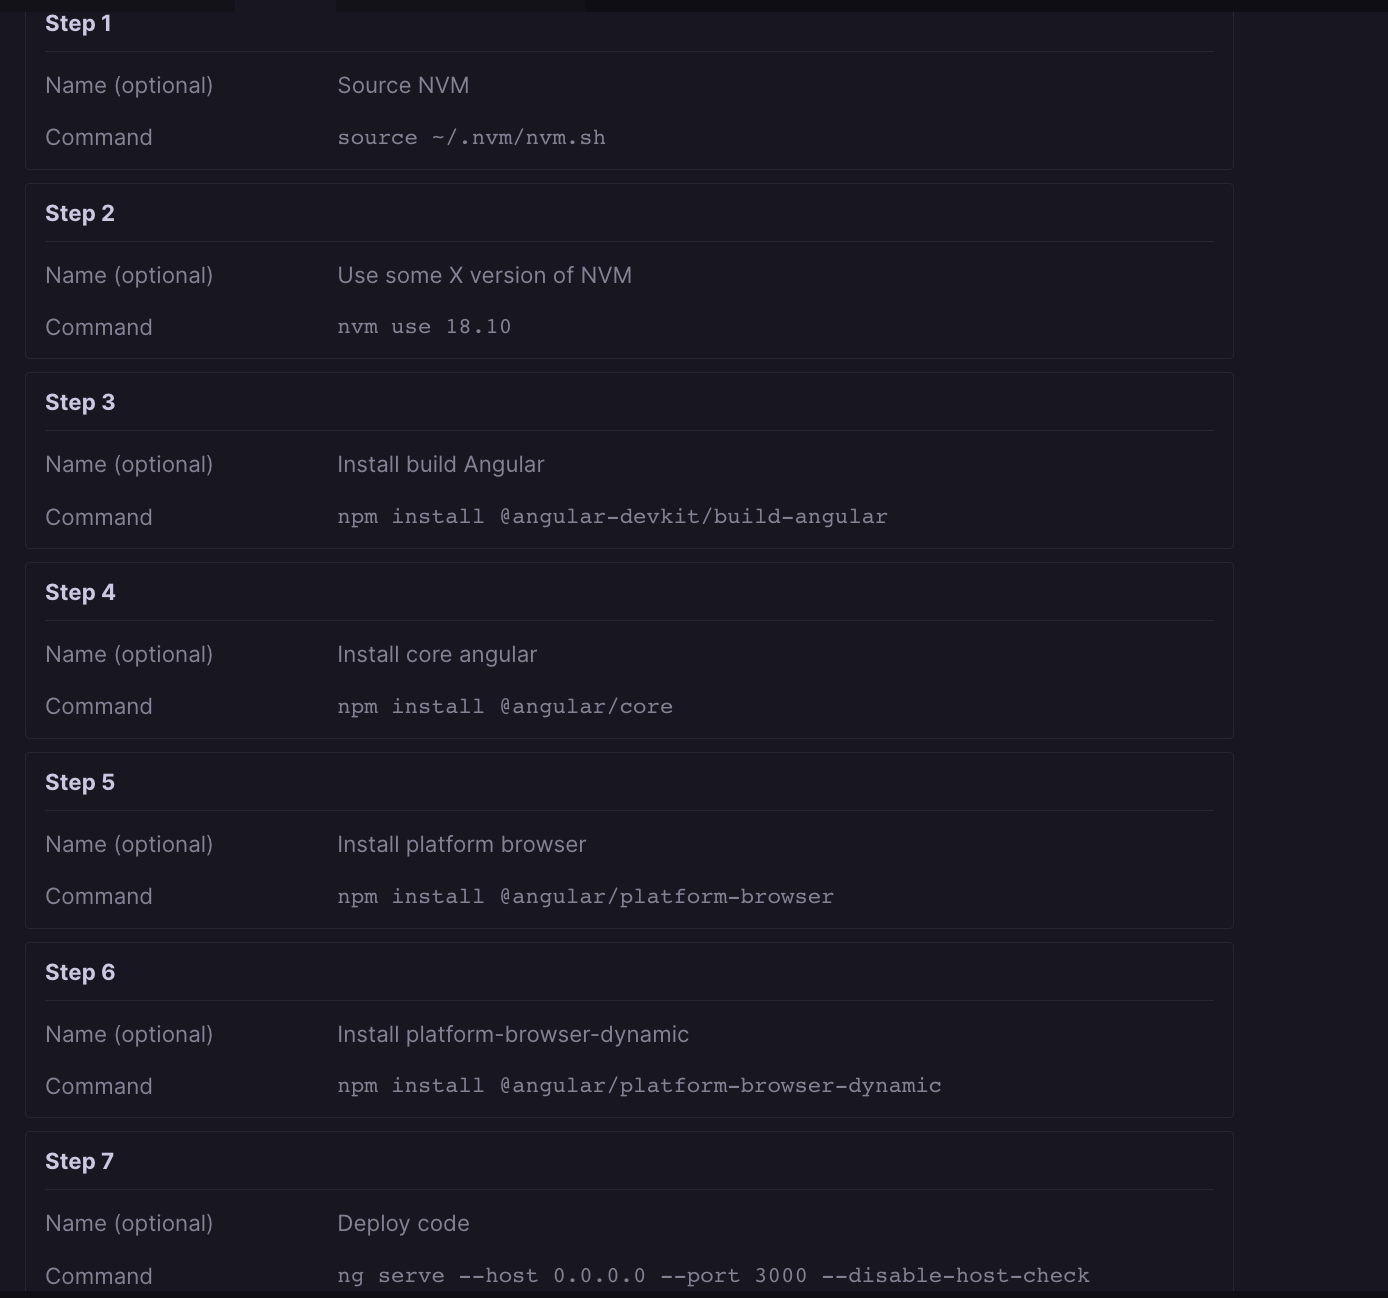
Then we will add the following steps in the “ Run” Stage
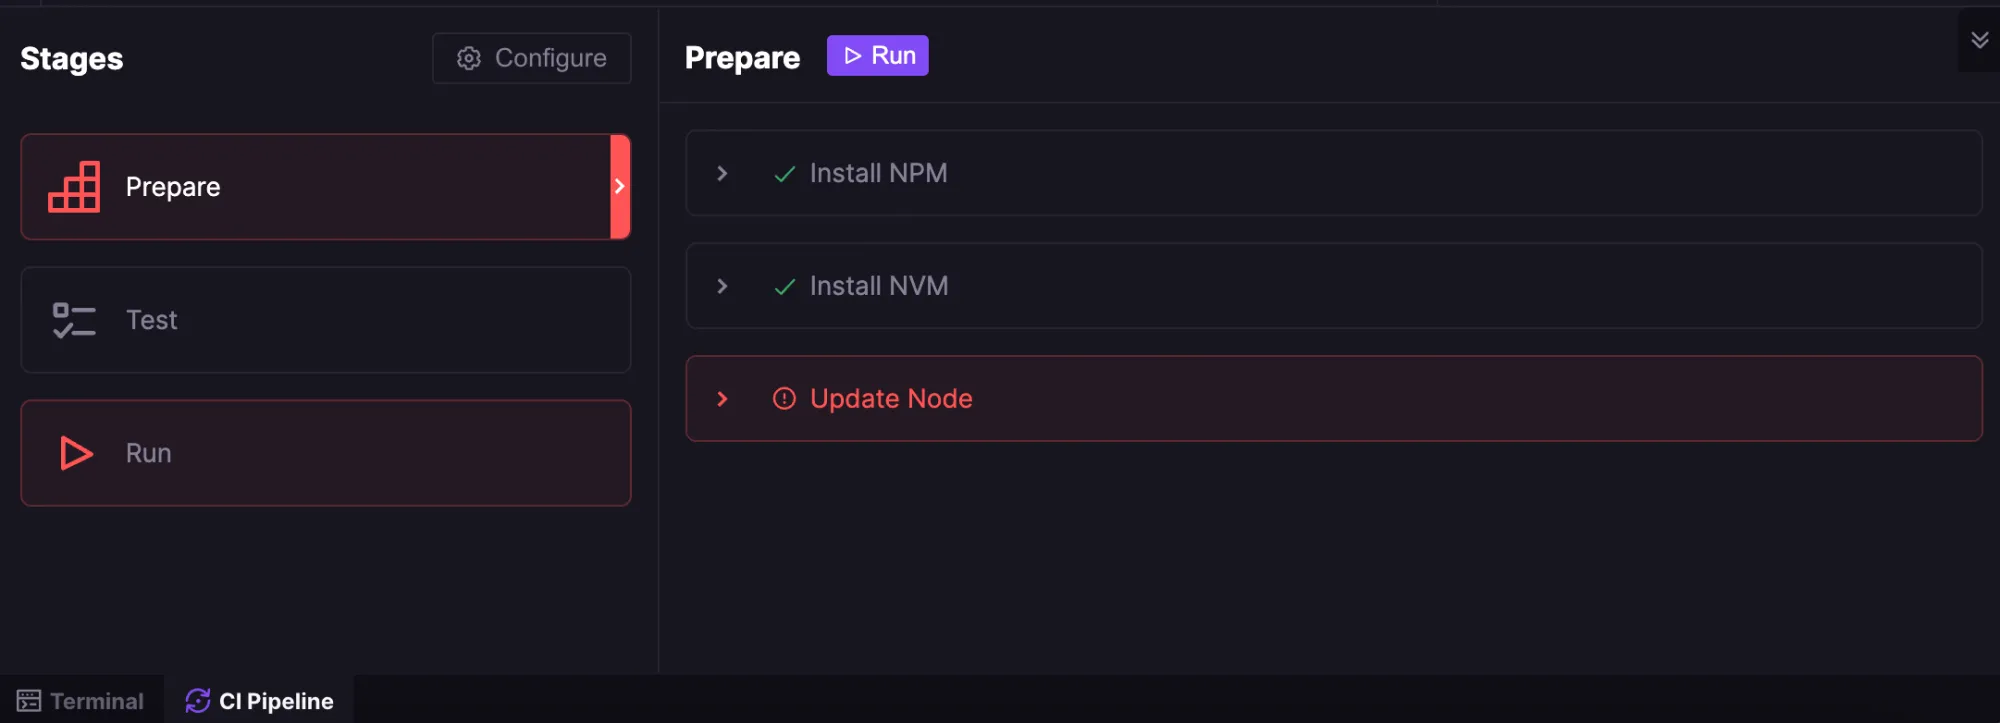
After saving these steps in our CI pipeline. We need to switch to the “CI pipeline” window from the “Terminal” window located at the bottom left side of your screen.
All we have to do now is select the “Prepare” stage and click run to build our application. After this, we select the “Run” stage and click the run button. You can now go back to the workspace overview and click on the domain connected to your application.
Wrap up
I definitely see myself using this application in my daily routine. However, this is a rather simple application to build. You can certainly add more functionality to it. I would like to hear how would you like to tweak it to make it more suitable for your day-to-day routine.
