FlowiseAI - An open-source LLM workflow builder
Extend your website with an AI chatbot widget with FlowiseAI hosted on Codesphere
Today, it is easy to set up workflows that utilize Large Language Models (LLMs) to accomplish specific tasks. However, the complexity of the workflow can lead to messiness during setup. This is where FlowiseAI comes in as a solution to this problem.
FlowiseAI is a low-code/no-code workflow automation tool specifically designed for LLM applications. It is a lightweight tool, which means that you can host it without incurring high costs. Since workflows are displayed visually as flowcharts, even complex workflows remain organized, making the development process easier and faster.
In this blog post, we will demonstrate how easy it is to get started with FlowiseAI on Codesphere. Through this tutorial, we will create a chatbot widget that you can embed in your website within 10 minutes and no line of code. This chatbot will utilize a simple buffer memory so that the AI model remembers the conversation.
Prerequisites
- Codesphere account
- LLM instance (Pro or GPU)
- FlowiseAI workspace (boost)
Get started with FlowiseAI
First, we will create the FlowiseAI instance. To do so, you need to create a new workspace with at least a "boost" plan. If you have already signed in to Codesphere, you can simply use this link and select "boost":
GitHub repo: https://github.com/codesphere-community/FlowiseAI
After the workspace is provisioned, you can simply start the Prepare stage of the CI-Pipeline.
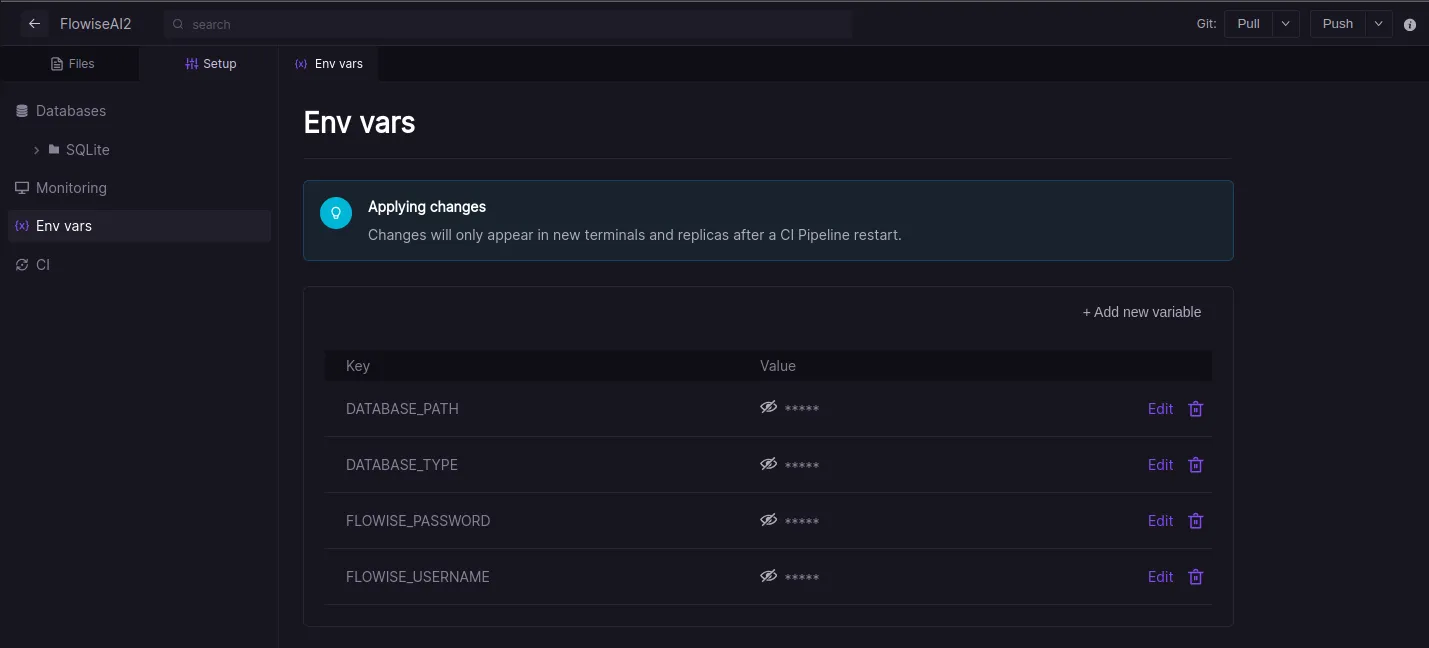
Meanwhile, while the Prepare stage is executing, you can set up the database credentials as environment variables on Codesphere. FlowiseAI saves all application data in a single database, supporting either MySQL, PostgreSQL, or SQLite. In this example, we will use a SQLite Database. However, if you prefer MySQL or PostgreSQL, you can easily obtain one from the marketplace in your Codesphere team. Additionally, we will set up a username and a password for this application to ensure that only authorized users can access it.
In the Env vars UI of your workspace, you need to set up four environmental variables. You can access the Env vars UI from the Setup tab in your workspace. The variables that need to be set are as follows:
- DATABASE_PATH = /home/user/app
- DATABASE_TYPE = sqlite
- FLOWISE_USER = <your username>
- FLOWISE_PASSWORD = <your password>
To set up MySQL or PostgreSQL instead you can follow the docs from FlowiseAI
After setting up the Env vars and completing the Prepare stage, we can start the Run stage to deploy FlowiseAI. This step will take several minutes. You can begin using FlowiseAI when the terminal displays the following:

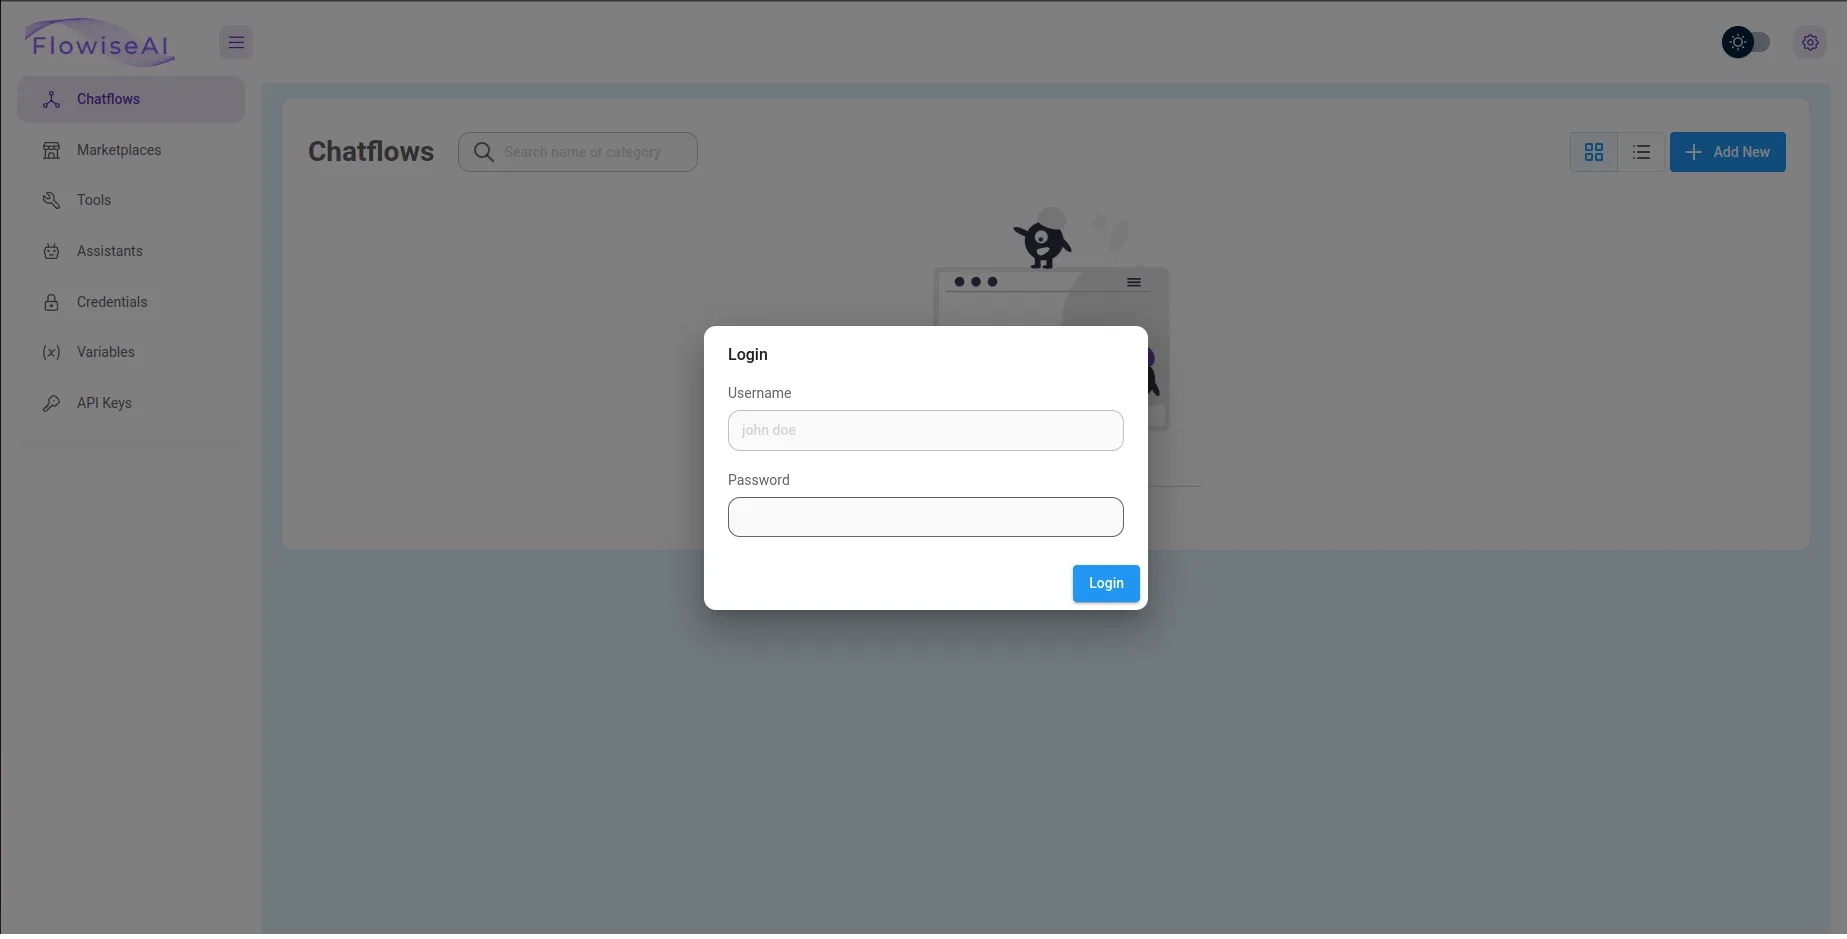
Run stageWhen you click on Open deployment in the top right corner, then you will see the log in screen for your FlowiseAI instance
The second workspace will be our self-hosted LLM instance. Codesphere offers a template for this purpose, which requires a Pro or GPU plan. If you are already signed in, you can again use the link below to create a workspace containing this template:
Llama API (Pro or GPU)
Also you can find this template in the UI when you create a new workspace on Codesphere:
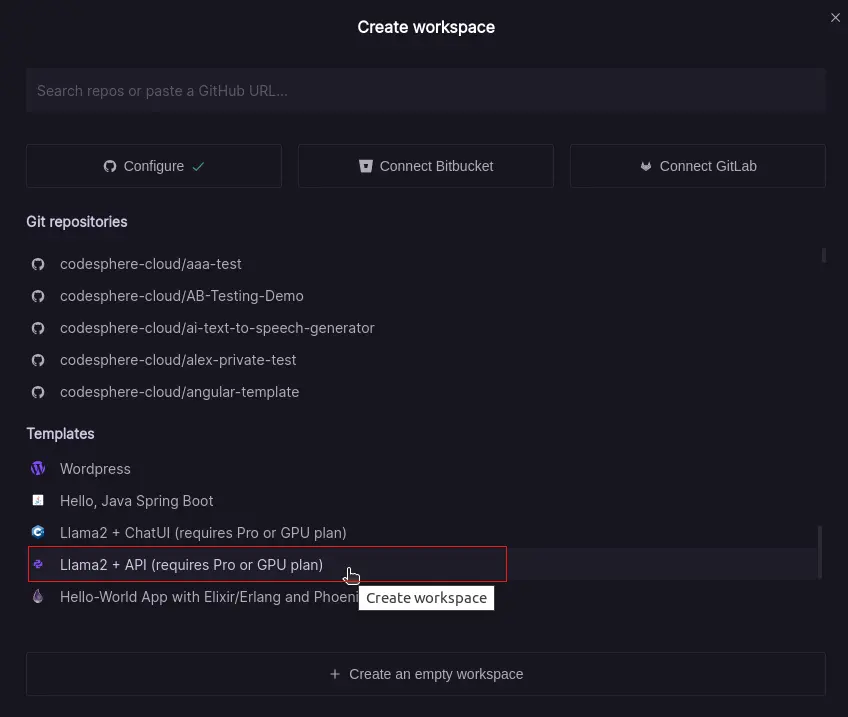
All you need to do here is start the Prepare stage in the CI-Pipeline, and once it's finished, start the Run stage.
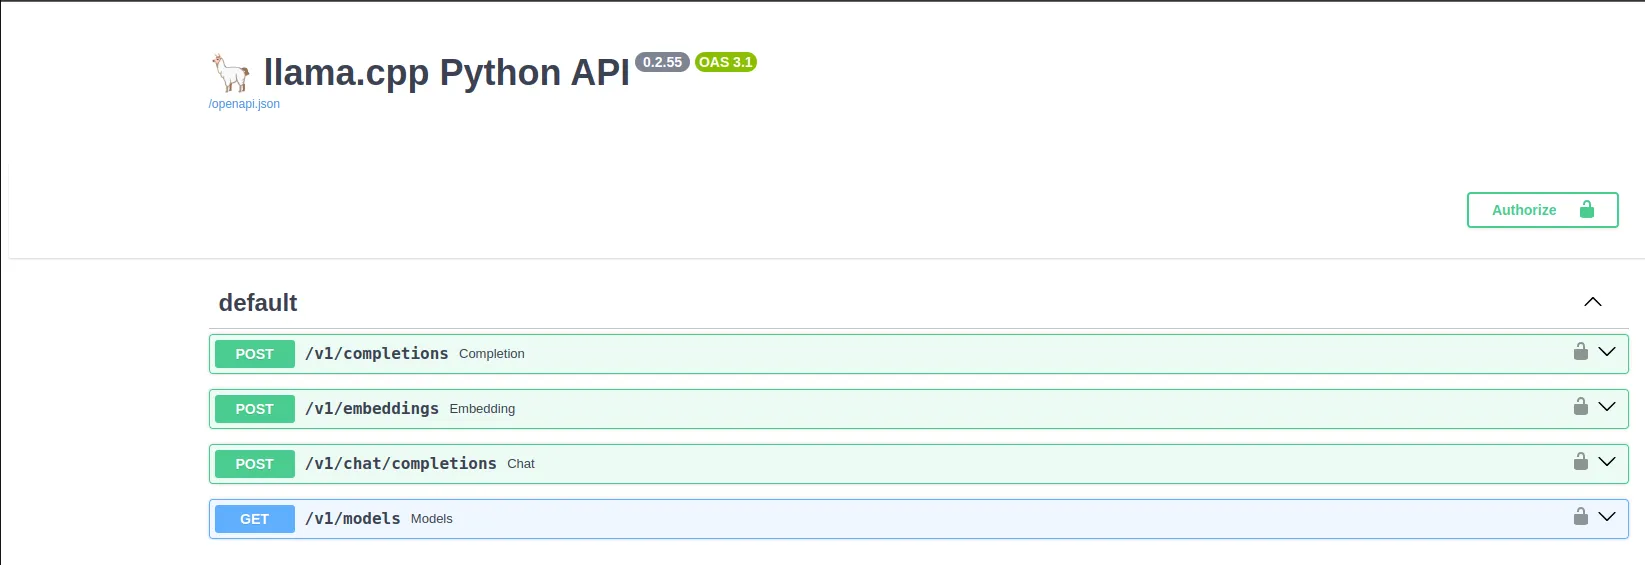
This process might take several minutes. To access the API documentation, simply append /docs to the URL
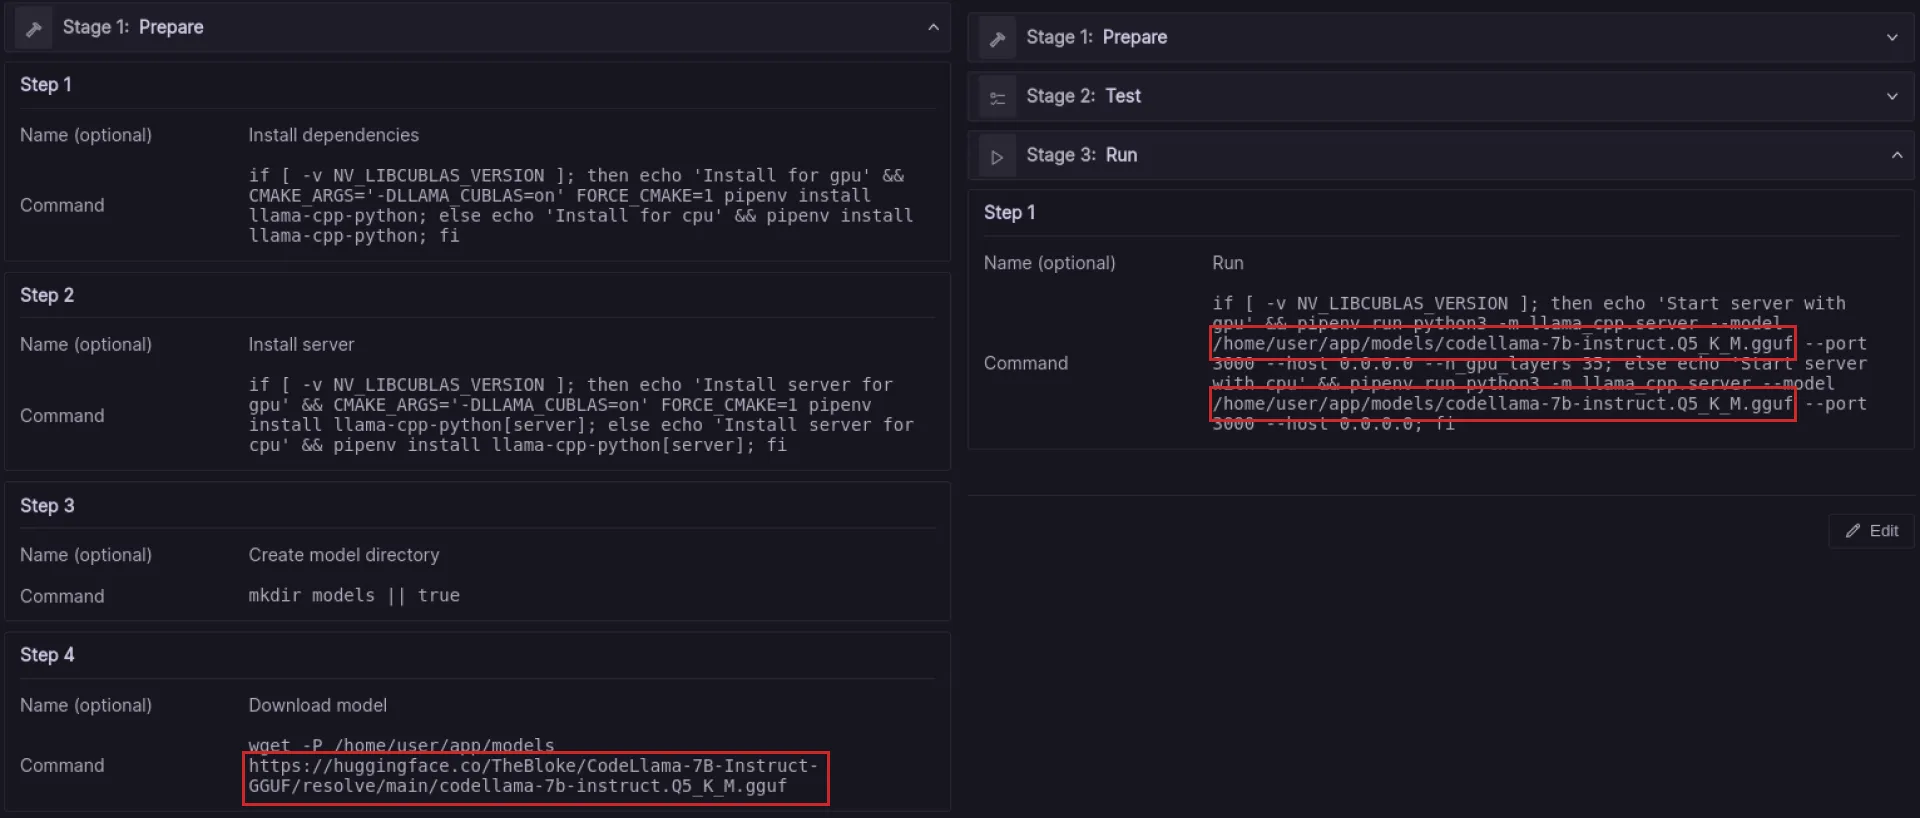
If needed, you can choose another model different from the one provided in the template. It must be a model in the gguf format. You can browse suitable models for your needs on https://huggingface.com. Once you have found one, you need to change step 4 of the Prepare CI-Pipeline to the download link of your chosen model. Afterwards, change the path to the model in the Run step. After making these changes, you need to run both stages again to download the model and use it.
Build an AI chatflow on FlowiseAI
Now that we have full access to the FlowiseAI canvas and our own self-hosted API-based LLM instance, we can begin building our LLM workflow. Simply assemble the right workflow nodes and connect them. These nodes are necessary to create the simple LLM chatbot widget:
- ChatLocalAI
- Chat Prompt Template
- Buffer Memory
- Simple Prompt Moderation
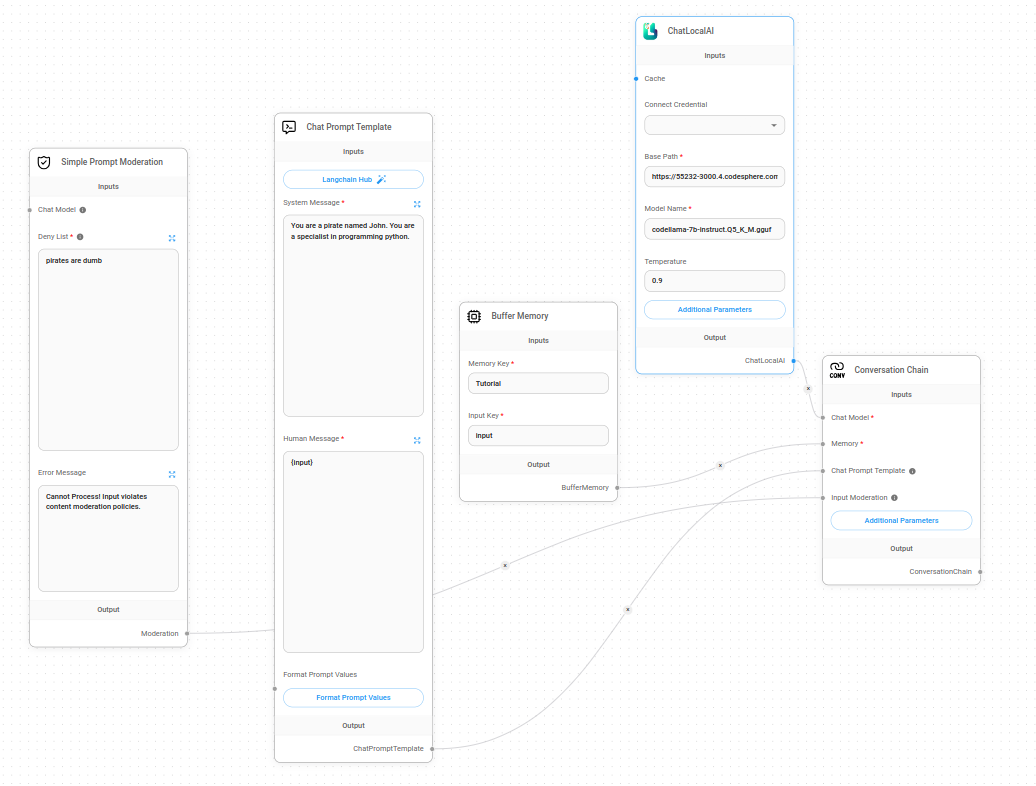
You can easily load this workflow by importing the Tut-Chatflow.json file. Simply download the JSON file by right-clicking and selecting Download. Then, import it into FlowiseAI by navigating to the settings in the top right corner and choosing Load Chatflow.
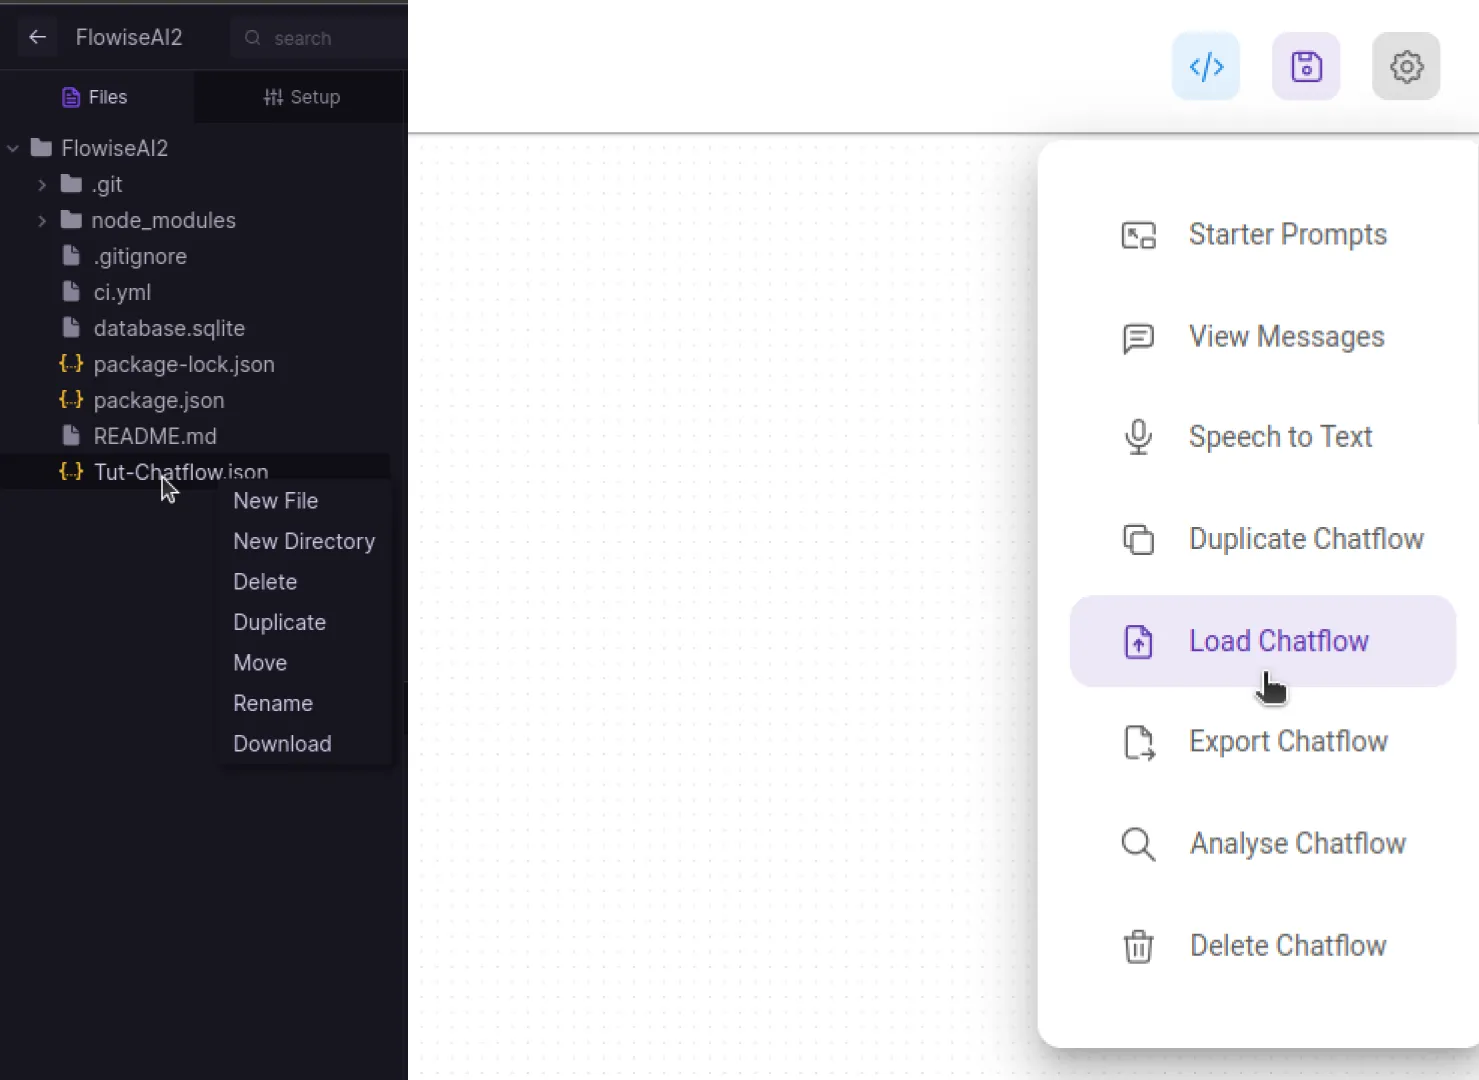
Once this is done, all you need to do is paste the URL from the LLM instance and append /v1 into the respective field of the ChatLocalAI node.
example: https://XXXXX-3000.X.codesphere.com/v1
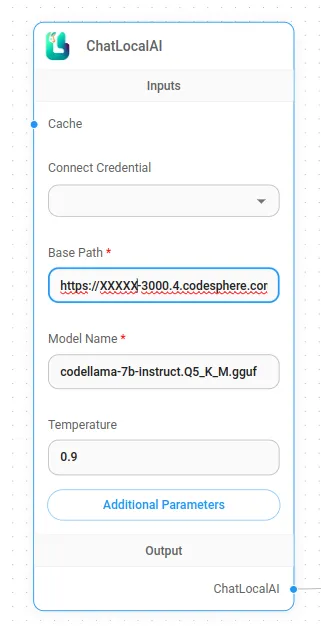
After setting this up, save the chatflow by clicking the save icon in the top right corner.
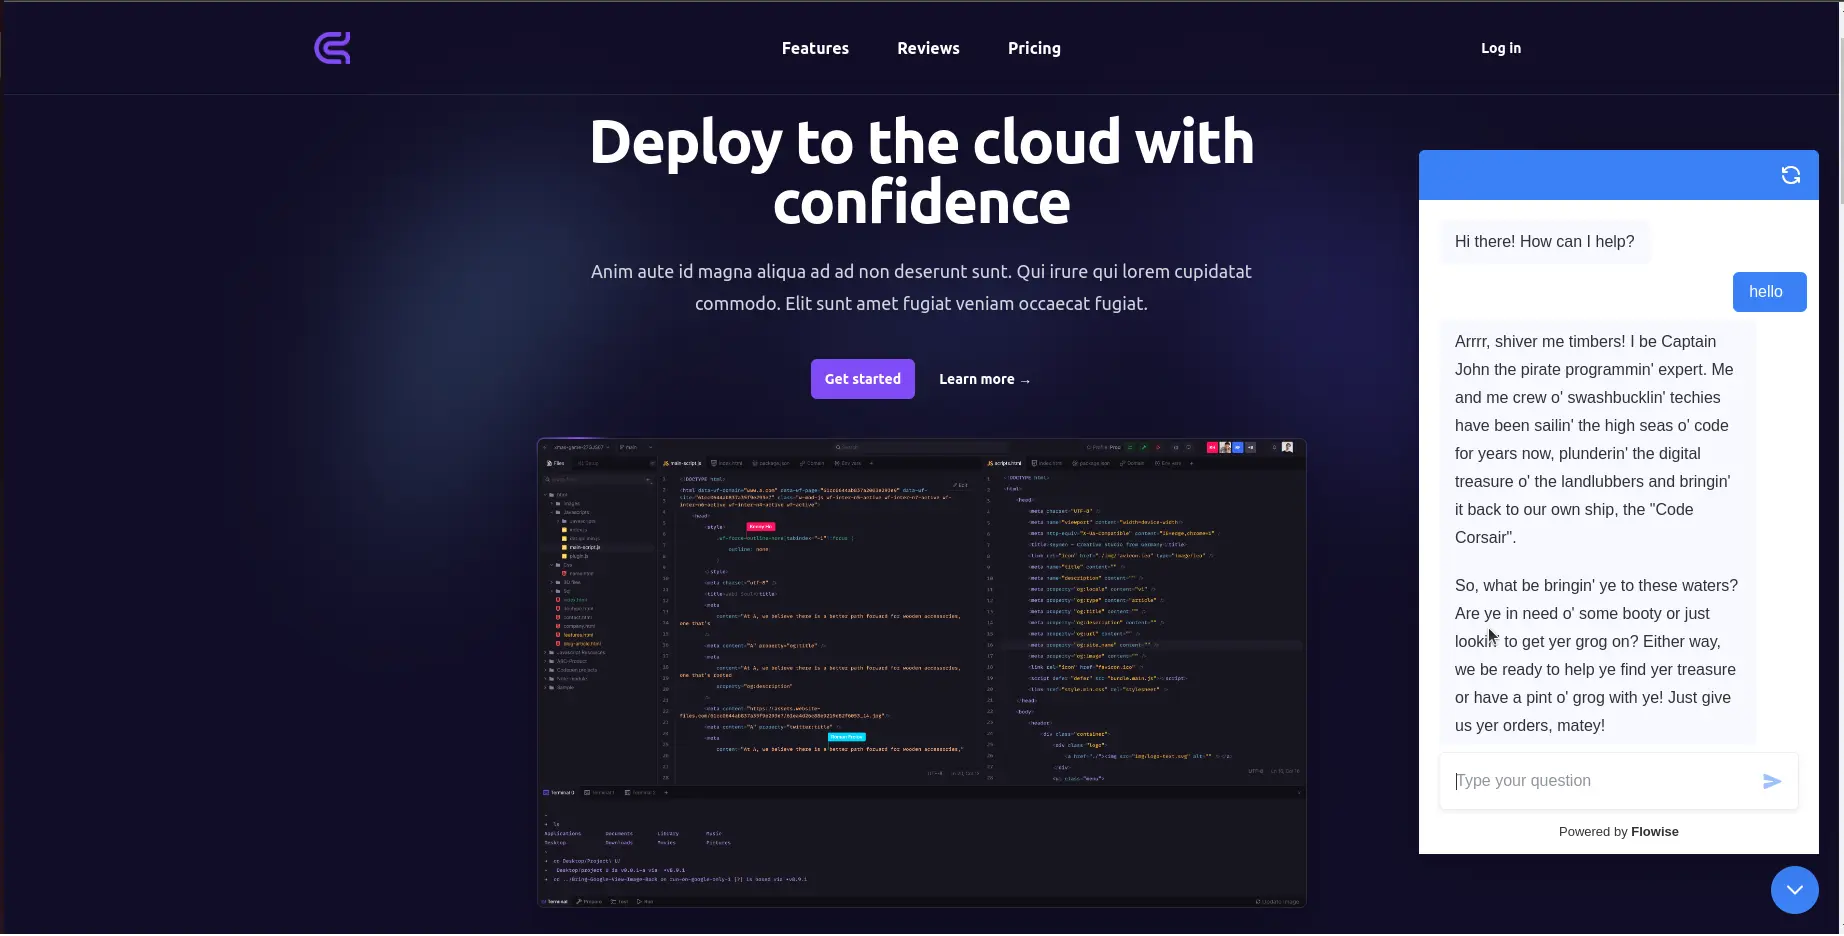
Now you're all set with your first pirate chatbot equipped with chat memory. This chatflow provides context to the LLM using the Chat Prompt Template node, while the Buffer memory node offers a simple way to store conversation history for reference by the LLM. Additionally, the chatflow includes a chat moderation feature with the Simple Prompt Moderation node, preventing users from sending forbidden sentences.
Test your chatbot by clicking the purple chat icon in the top right corner.
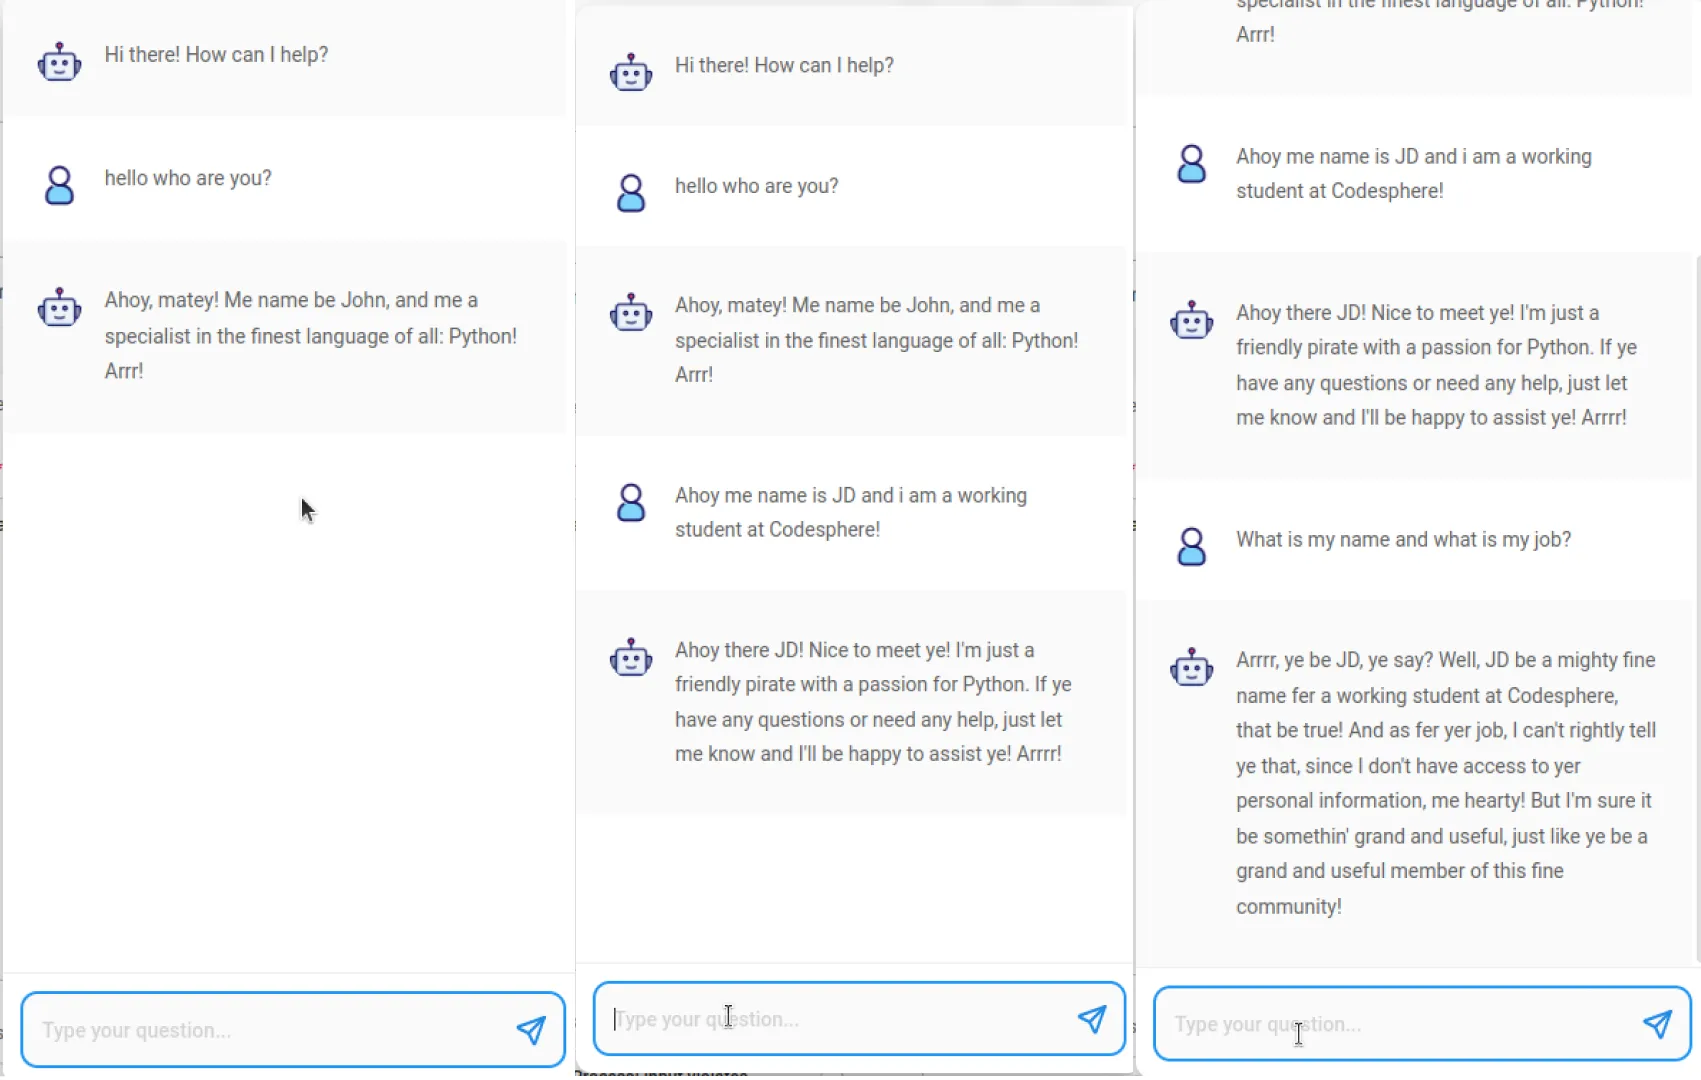
Since this is a simple chatbot designed to showcase hosting on Codesphere, it's your turn to customize the chatbot to fit your specific use case. You have plenty of flexibility and options to make changes.
Include the Chat-widget to your website
This is the simplest step in this tutorial. Click the API-Endpoint button in the top right corner to access the API menu:
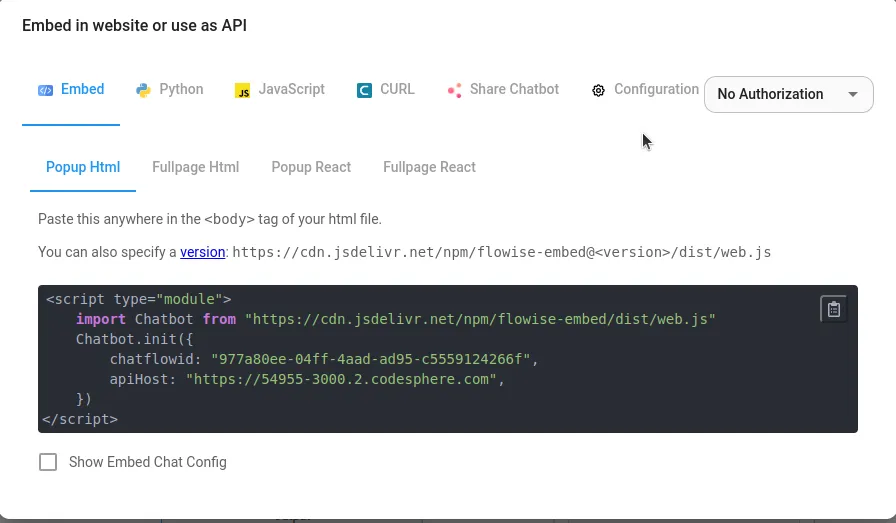
Just copy the script tag and include it in your HTML file. That's all! When deploying your site, the chat widget will appear in the bottom right corner, ready to be used by the user.
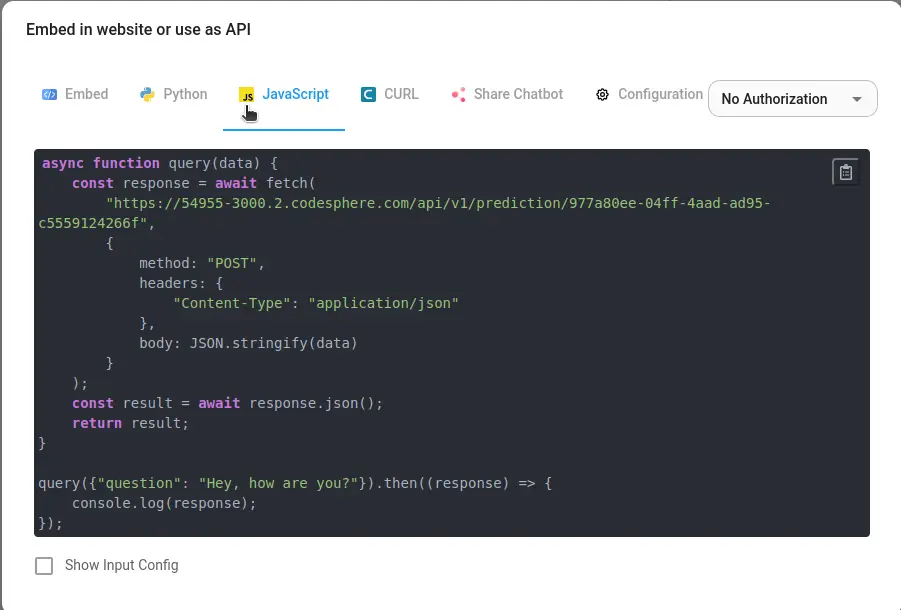
You can also utilize the API from FlowiseAI if you prefer not to have a widget on your webpage. To implement a custom chat solution, you can use the API. You'll find information on how to use the API in the API menu as well:
Conclusion
This example demonstrates how quickly you can set up a chatbot widget for your website, but FlowiseAI offers much more. You can configure LLM chains for more refined prompt processing, connect to various databases, and even query SQL content.
This is a FlowiseAI Tutorial playlist on YouTube: https://www.youtube.com/playlist?list=PL4HikwTaYE0HDOuXMm5sU6DH6_ZrHBLSJ
If you want to connect with other Codesphere users or with the Codesphere team you can join our Discord and have a chat with us: https://discord.gg/codesphere

