n8n - a Cost-Saving Zapier Alternative Hosted on Codesphere
Host your own Zapier alternative in the cloud on Codesphere and save money! Lets get started with your first workflow with n8n.
In the world of automating tasks, Zapier has been a go-to for many. But here's the thing – if you're looking for more control and a wallet-friendly option, consider n8n the open-source workflow automation tool.
The cool thing is that you can host it yourself, and if you do it on Codesphere, you'll save money compared to use Zapier. Plus, you get full control over your data and how your workflows play out.
In this article, we're going to show you just how simple it is to set up your own n8n instance on Codesphere. We will guide you through the process of getting started effortlessly. Let's make the most of n8n's potential with the ease of self hosting on Codesphere – it's a win-win.
set up the n8n workspace
Let's get your n8n workspace up and running on Codesphere. You just need to follow these steps:
- Choose Your Plan (at least boost plan):
Pick either "Always On" or "Off When Unused" for your workspace. If you choose "Off When Unused," remember it shuts down after an hour of inactivity. Don't worry, though—your workspace will reboot the next time you use it, although it might take a bit.
- Add this GitHub Repository:
link: https://github.com/codesphere-cloud/n8n-Template
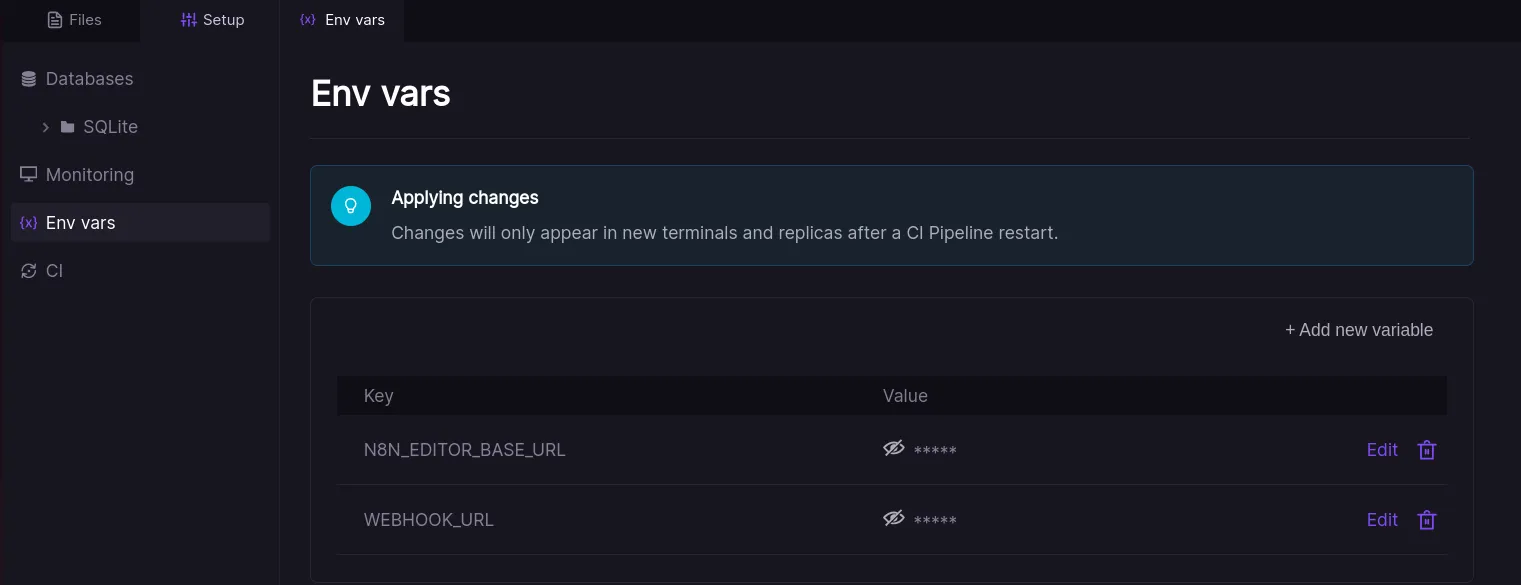
- Create two environmental variables:
- a) N8N_EDITOR_BASE_URL = <insert here your workspace URL>
- b) WEBHOOK_URL = <insert here your workspace URL>
- Run "Prepare" and "Run" stages in the CI-Pipeline:
- Open Deployment and Set Up the user account for this n8n instance
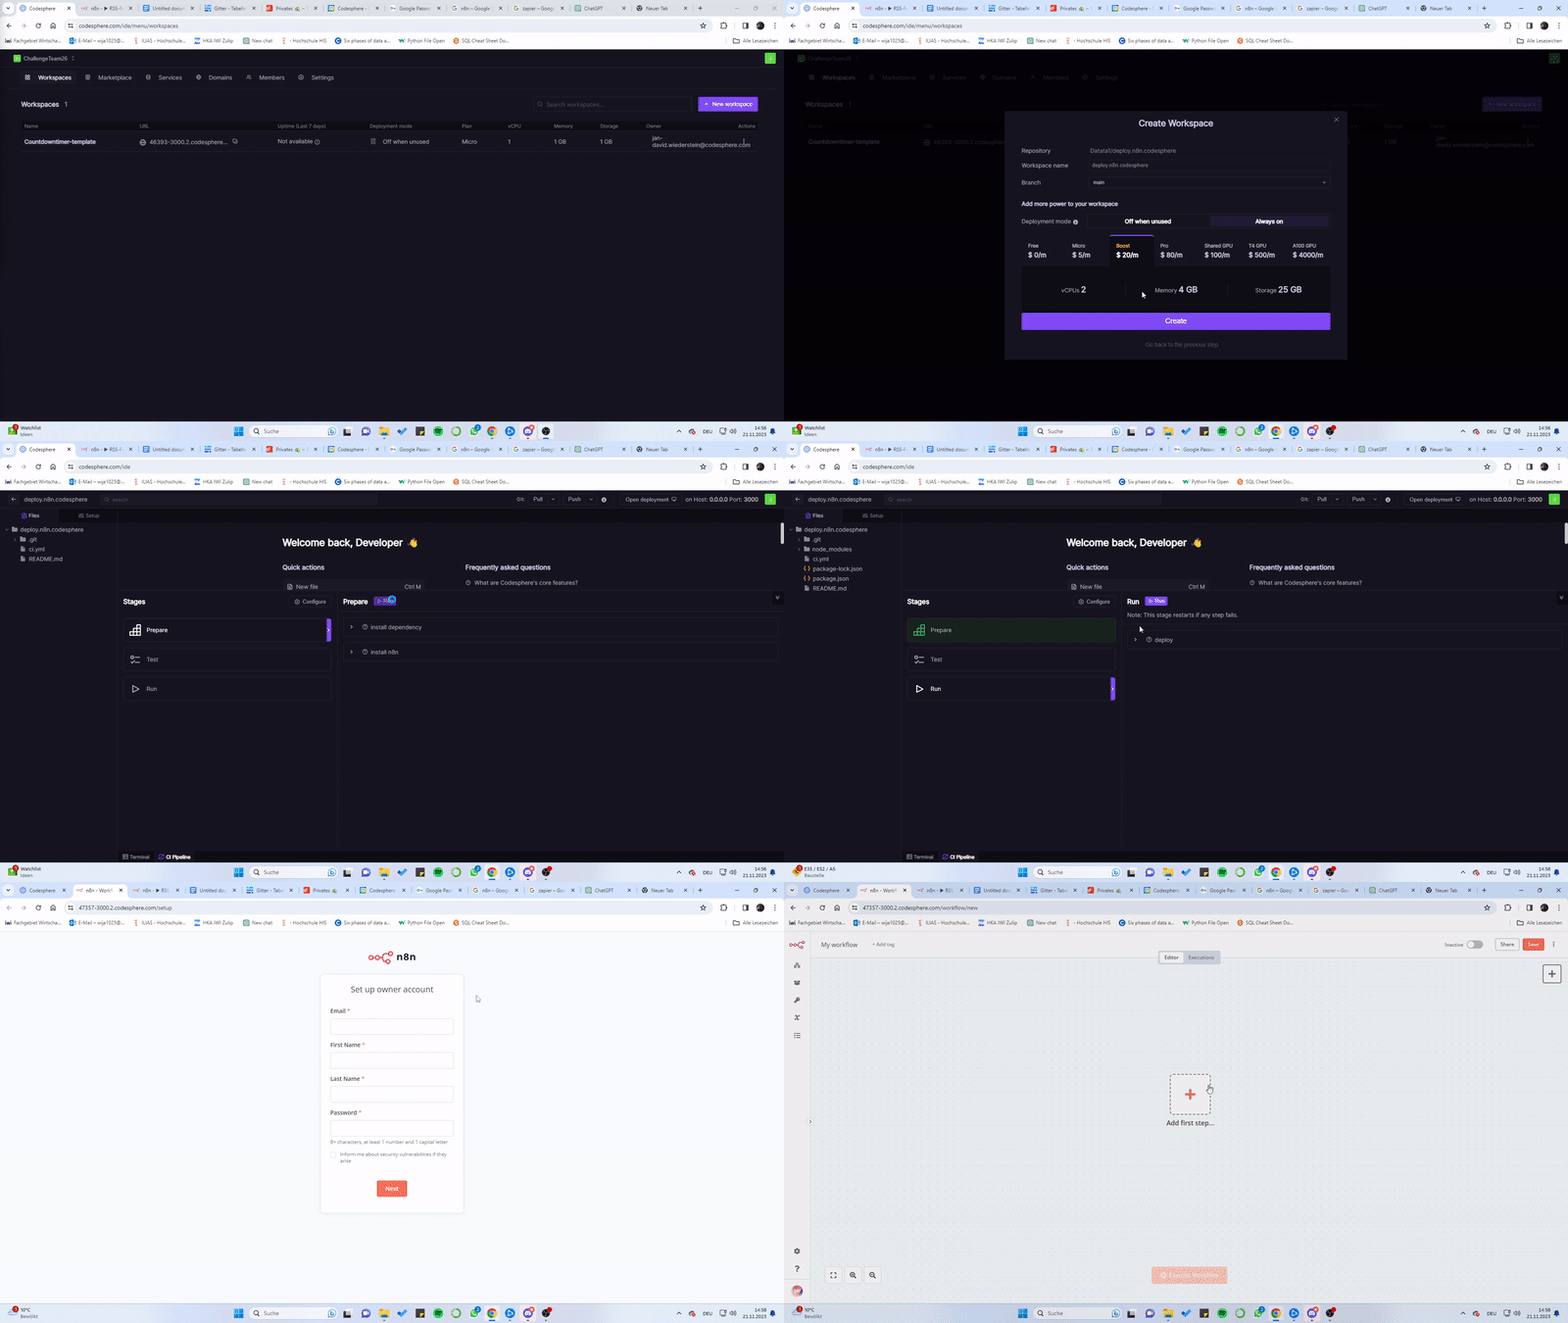
Your n8n workspace is set! Now, dive in and start creating your workflows. The n8n interface is user-friendly, making it easy to build workflows tailored to your tasks.
Next up, we'll guide you through setting up the workflow integrations: Discord, Todoist and Rowbase.
Loading the predefined workflow
Now that your n8n workspace is up and running on Codesphere, let's dive into effortlessly loading a predefined workflow. Follow these simple steps:
- Download the Workflow JSON:
In the Codesphere IDE, right-click on the provided JSON file for the predefined workflow. Select "Download" to save it directly to your device.
- Import the Workflow:
Inside your n8n workspace, navigate to the workflows section. Look for the "Import" option and upload the downloaded JSON file. This action will seamlessly import the predefined workflow into your n8n instance.
- Save Changes
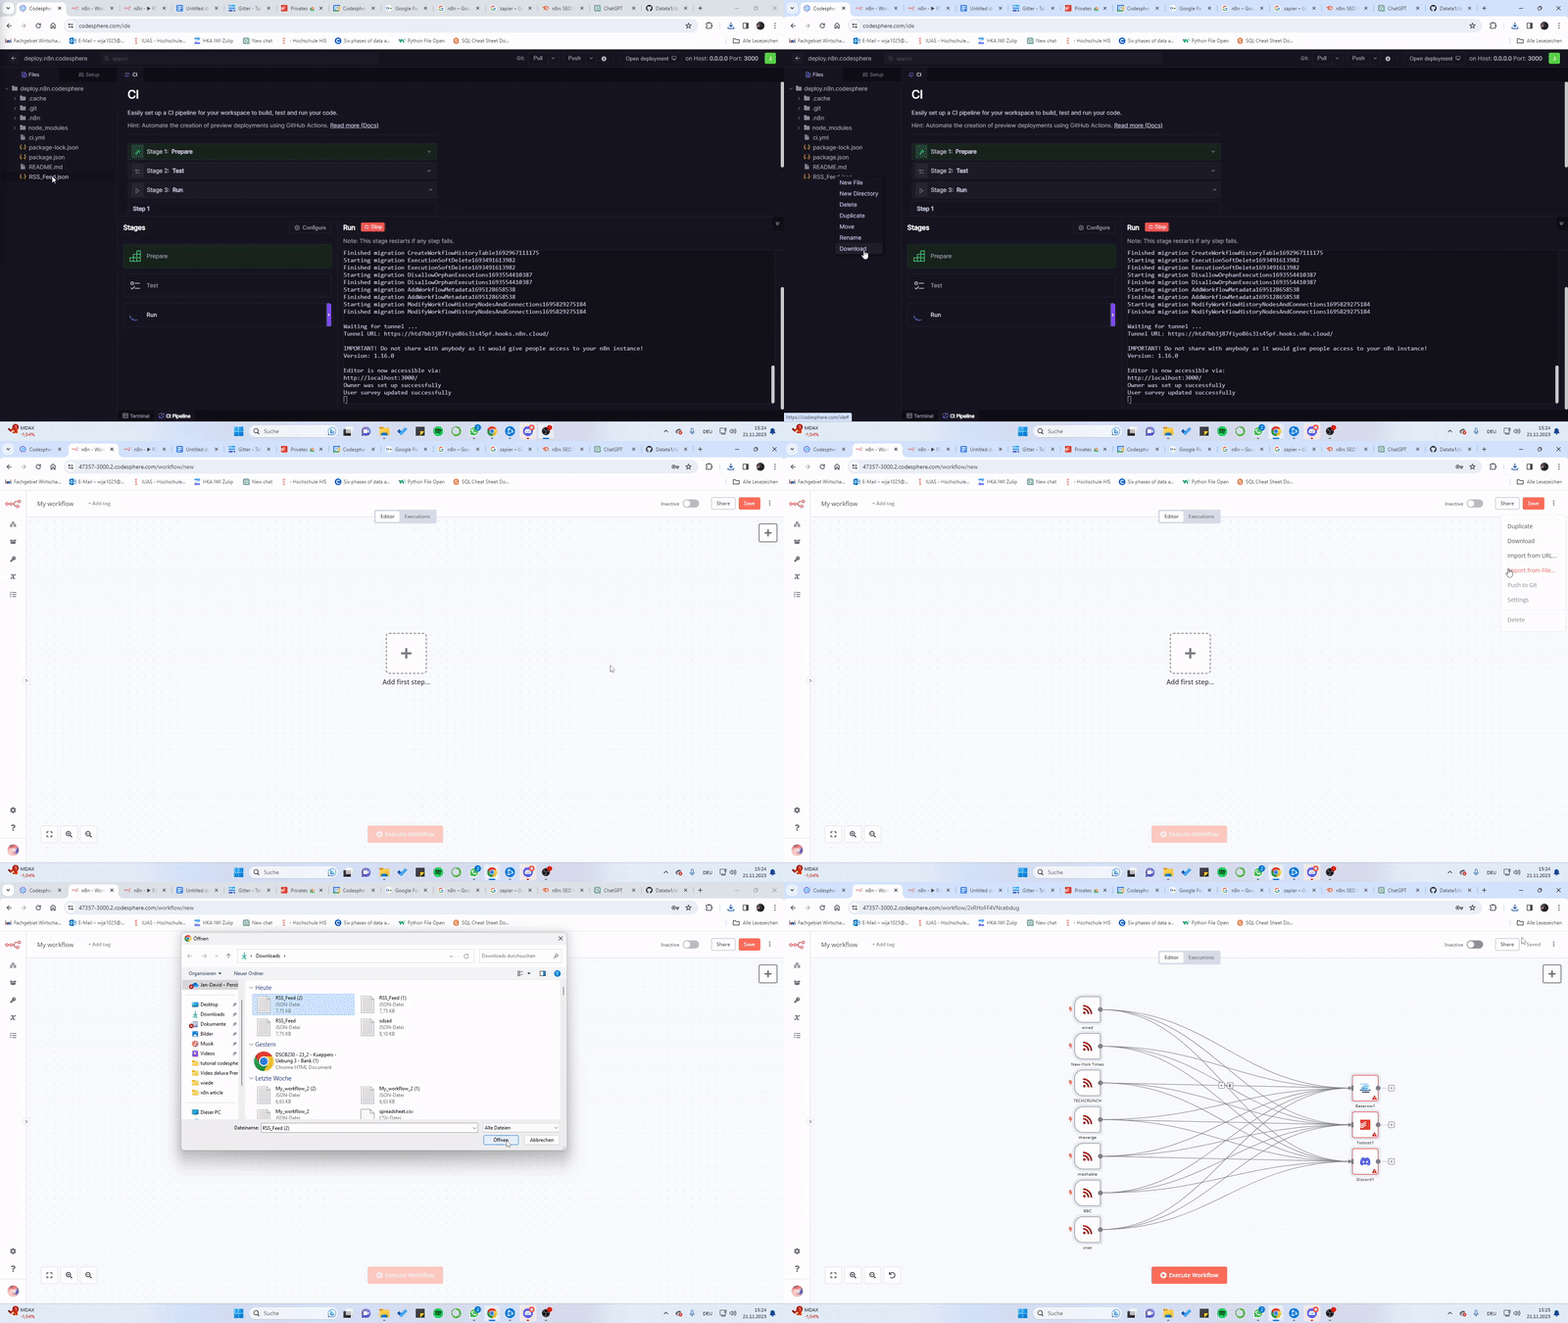
Next up, we'll guide you through creating a workflow. This one uses RSS feeds to share the latest news on Discord, organizes article data in a table, and sets up a task in a to-do list. This workflow is a hands-on example to demonstrate n8n's flexibility and power.
Prerequisites
Once you've completed setting up the n8n instance on Codesphere, ensure you have these accounts ready before diving into the showcase workflow:
Prerequisites for the Showcase:
- Baserow Account: Create an account on Baserow and create a new database.
- Todoist Account: Make sure you have a Todoist account, as it's part of our workflow.
- Discord Account: If you don't have one yet, sign up for a Discord account and create a new server
Let's get started with setting up the workflow integrations and see what n8n has to offer!
Setting Up Workflow Integrations: Discord
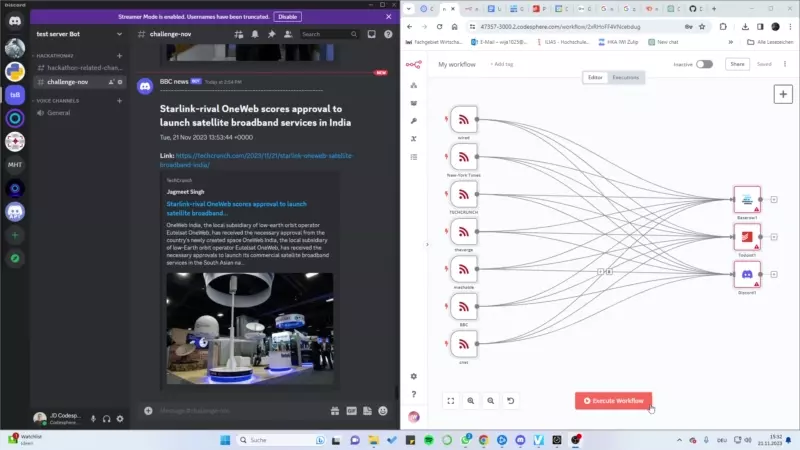
Navigate to your Discord server settings and select "Integrations" from the menu. Create a new webhook and copy its URL. Paste this URL into the n8n webhook URL field. In the n8n content field, you can define the message the webhook should generate based on the RSS-feed data.
Setting Up Workflow Integrations: Todoist
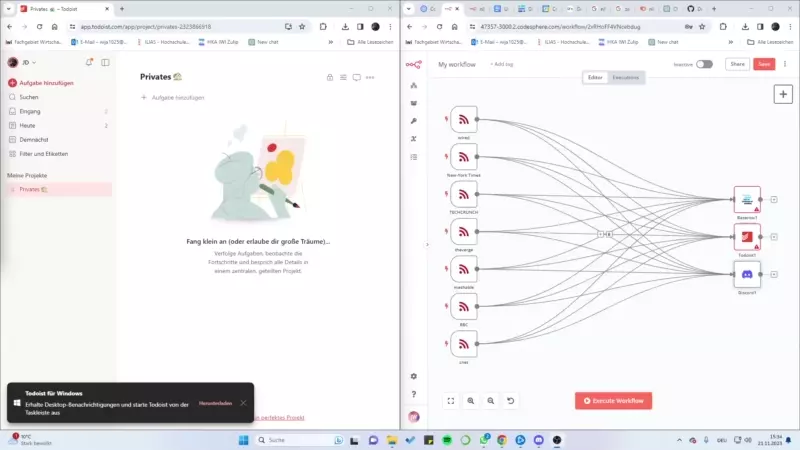
In the n8n UI, create a new credential for Todoist. Copy the API token from Todoist's settings in the "Integrations" tap and select "Developers" to obtain the API token. Paste the API token into the password field of the n8n credential.
Setting Up Workflow Integrations: Rowbase
For this integration, you need to set up a Rowbase credential. Simply click on 'Create New Credential,' and enter the email address associated with your Rowbase account in the username field, along with your Rowbase account password in the respective fields.
Once this step is completed, proceed to configure the additional required fields in the Rowbase node to populate the data in the desired table. To achieve this, you'll need to extract the Database ID from the API Documentation of your Rowbase Database. Copy and paste the Database ID into n8n.
To load the database into the node, exit the node menu and re-enter it. Now you can choose the table where you want to input the data. Once again, exit the node menu and re-enter it to select the specific columns for your article data.
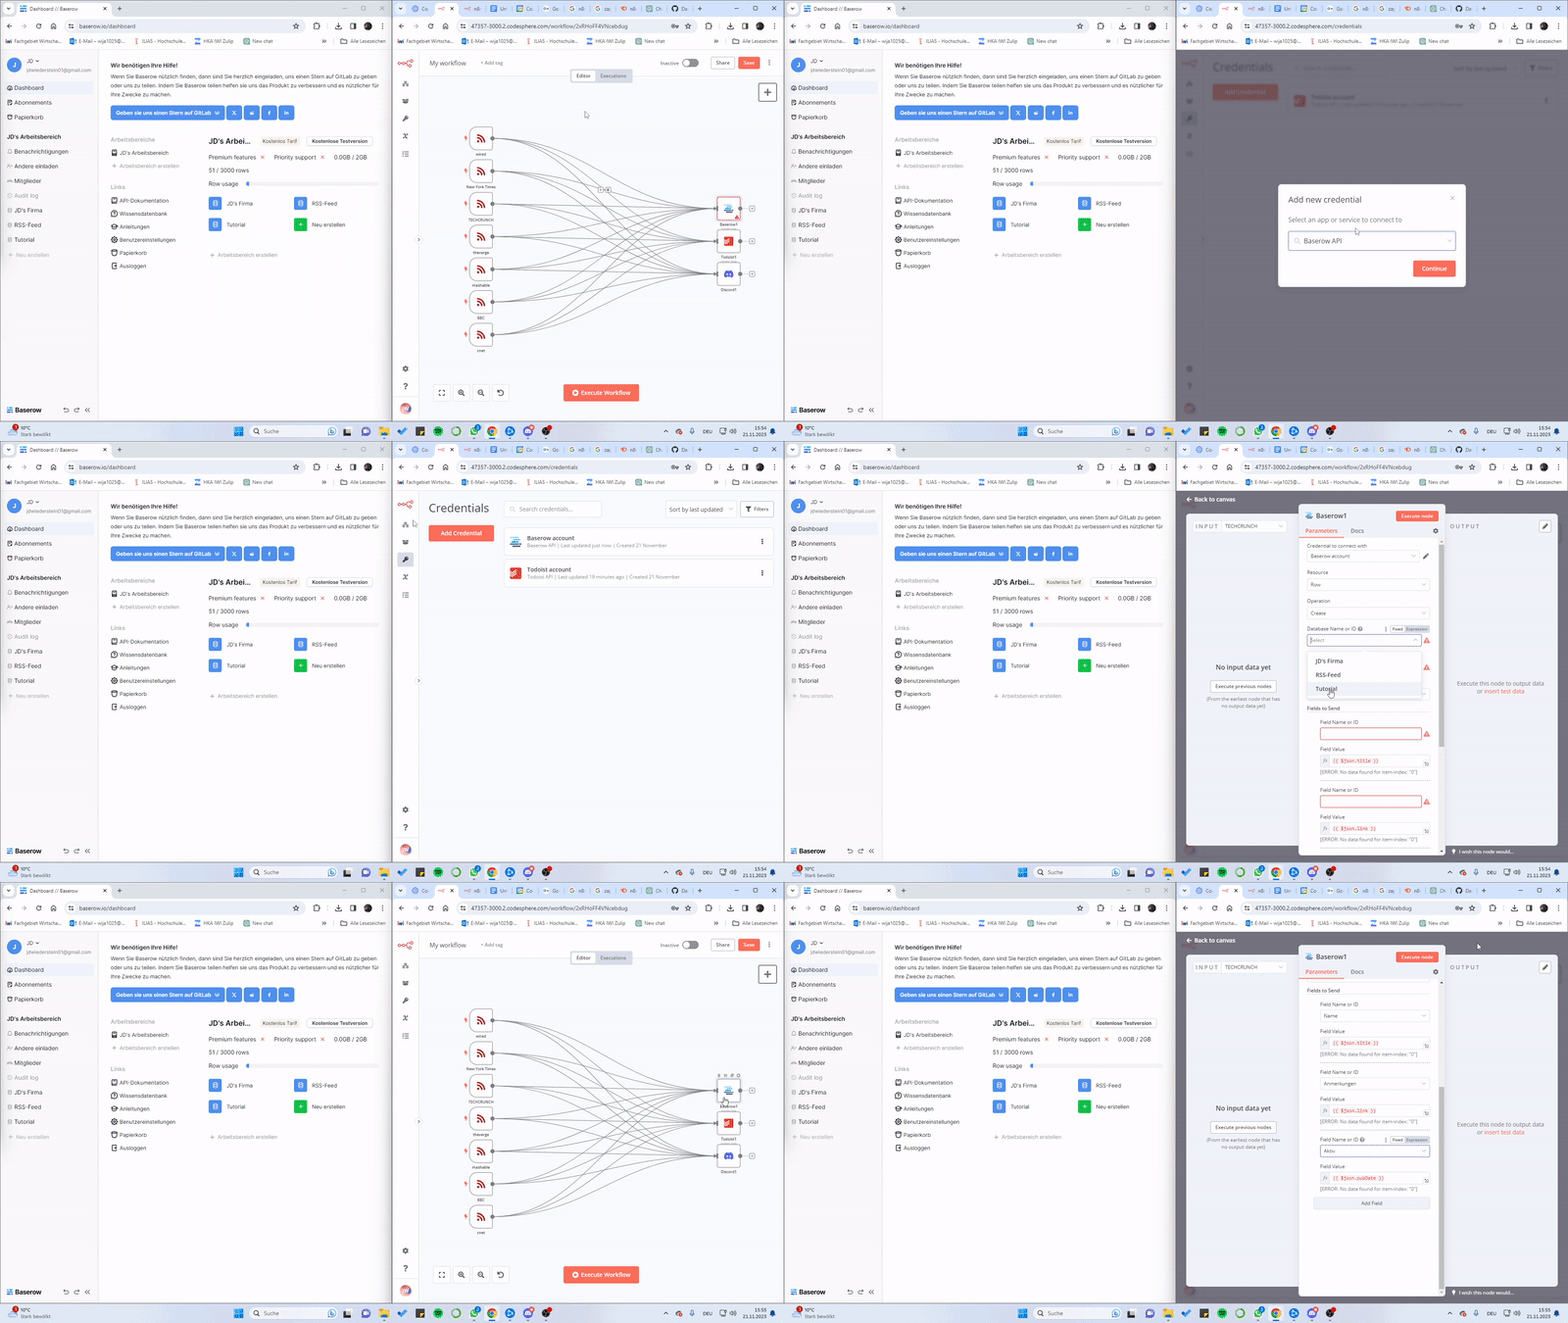
Once completing these steps, you can save your workflow and activate it. This ensures seamless communication between n8n, Discord, Todoist, and Rowbase, allowing you to automate tasks effortlessly.
Adding a Custom RSS-Feed Trigger
To integrate any RSS feed of your choice into the workflow, follow these steps to create a new RSS-feed trigger:
- Create a New RSS-Feed Trigger:
Within the n8n workspace, add a new RSS-feed trigger node to your workflow.
- Copy RSS-Feed URL:
Obtain the URL of the desired RSS feed that you want to integrate.
- Configure the RSS-Feed Trigger:
Paste the copied RSS-feed URL into the URL field of the RSS-feed trigger node. This ensures that the trigger is connected to the specific RSS feed you want to monitor.
- Connect Trigger to Workflow Nodes:
Link the RSS-feed trigger to each subsequent node in your workflow. This connection ensures that the workflow responds to updates from the specified RSS feed.
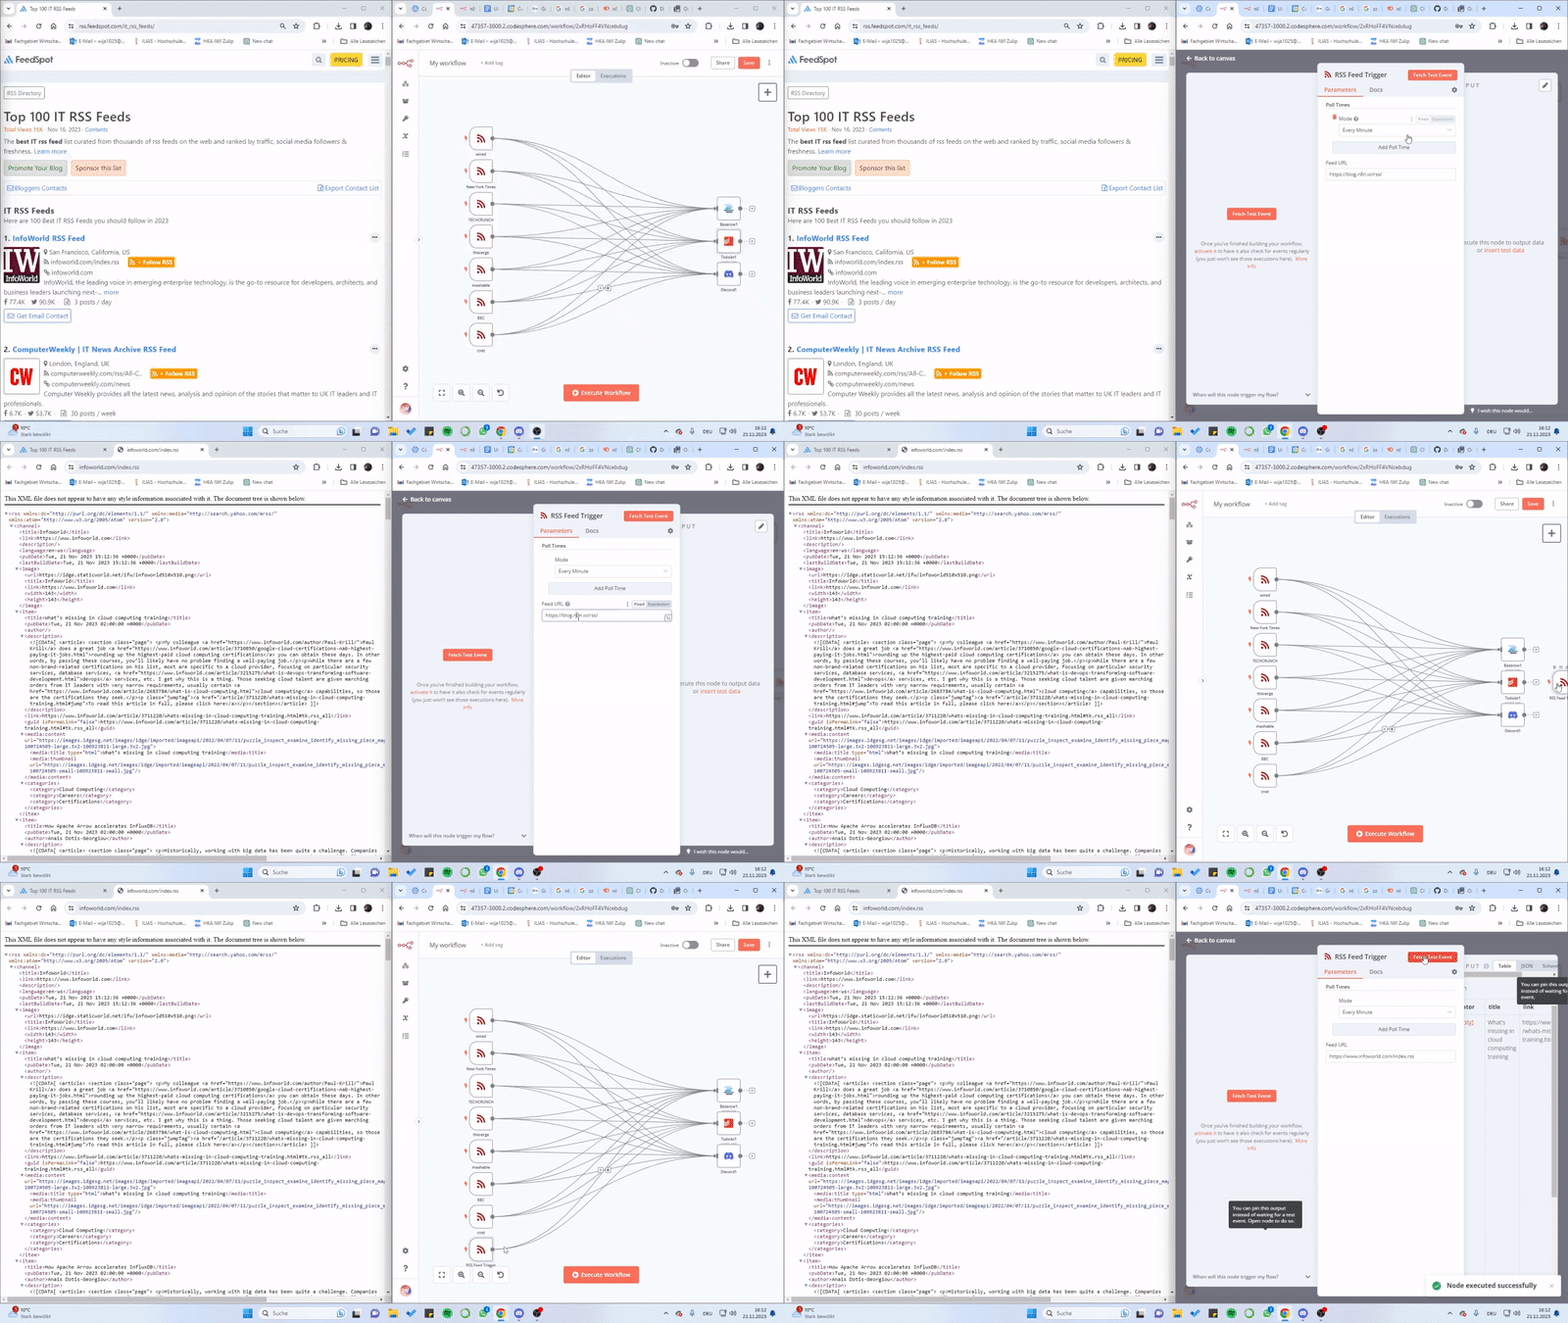
Link: Top 100 RSS-Feeds about IT
Conclusion
With these simple steps, you've now extended the flexibility of your workflow to incorporate updates from any RSS feed of your choice. The dynamic nature of n8n allows you to adapt and customize your automation seamlessly. Your workflow is now ready to efficiently process and act upon the latest information from the "subscribed" RSS feed.
With n8n's incredible flexibility, the options for automation are limitless. This powerful tool offers a variety of features, leaving a wide array of automation possibilities ready for you to explore.
Are you interested to learn more about Codesphere and n8n? Connect with fellow Codesphere users and reach out to our support team by joining our Discord server!

