Getting started with Stable Diffusion Text2Img AI
Getting started with open source image generation AI has gotten a lot easier. In this post we will show you some helpful tricks to get started.
Stable diffusion has become the staple of open source image generation AI. Similar to Llama anyone can use and work with the stable diffusion code. Tons of other open source projects build on top of it.
Generally you can use stable diffusion & related models to either generate images from prompts or edit images with prompts (text2img or img2img).
Running stable diffusion
The most comfortable way to work with stable diffusion is via the open source webUI https://github.com/AUTOMATIC1111/stable-diffusion-webui. Unlike other alternatives that require deeper understanding of the underlying code and working with command line prompts - this webUI comes with a 1-click installer and a web view with all the configuration options you might need. You can run it locally (if you have a strong graphics card & CPU) or run it via a cloud provider that offers GPU environments. If you’re looking for free cloud GPU's check out our comparison article here https://codesphere.com/articles/5-best-free-cloud-gpu-providers-for-hobbyists
If you are using Codesphere to deploy your stable diffusion webUI you can use our template.
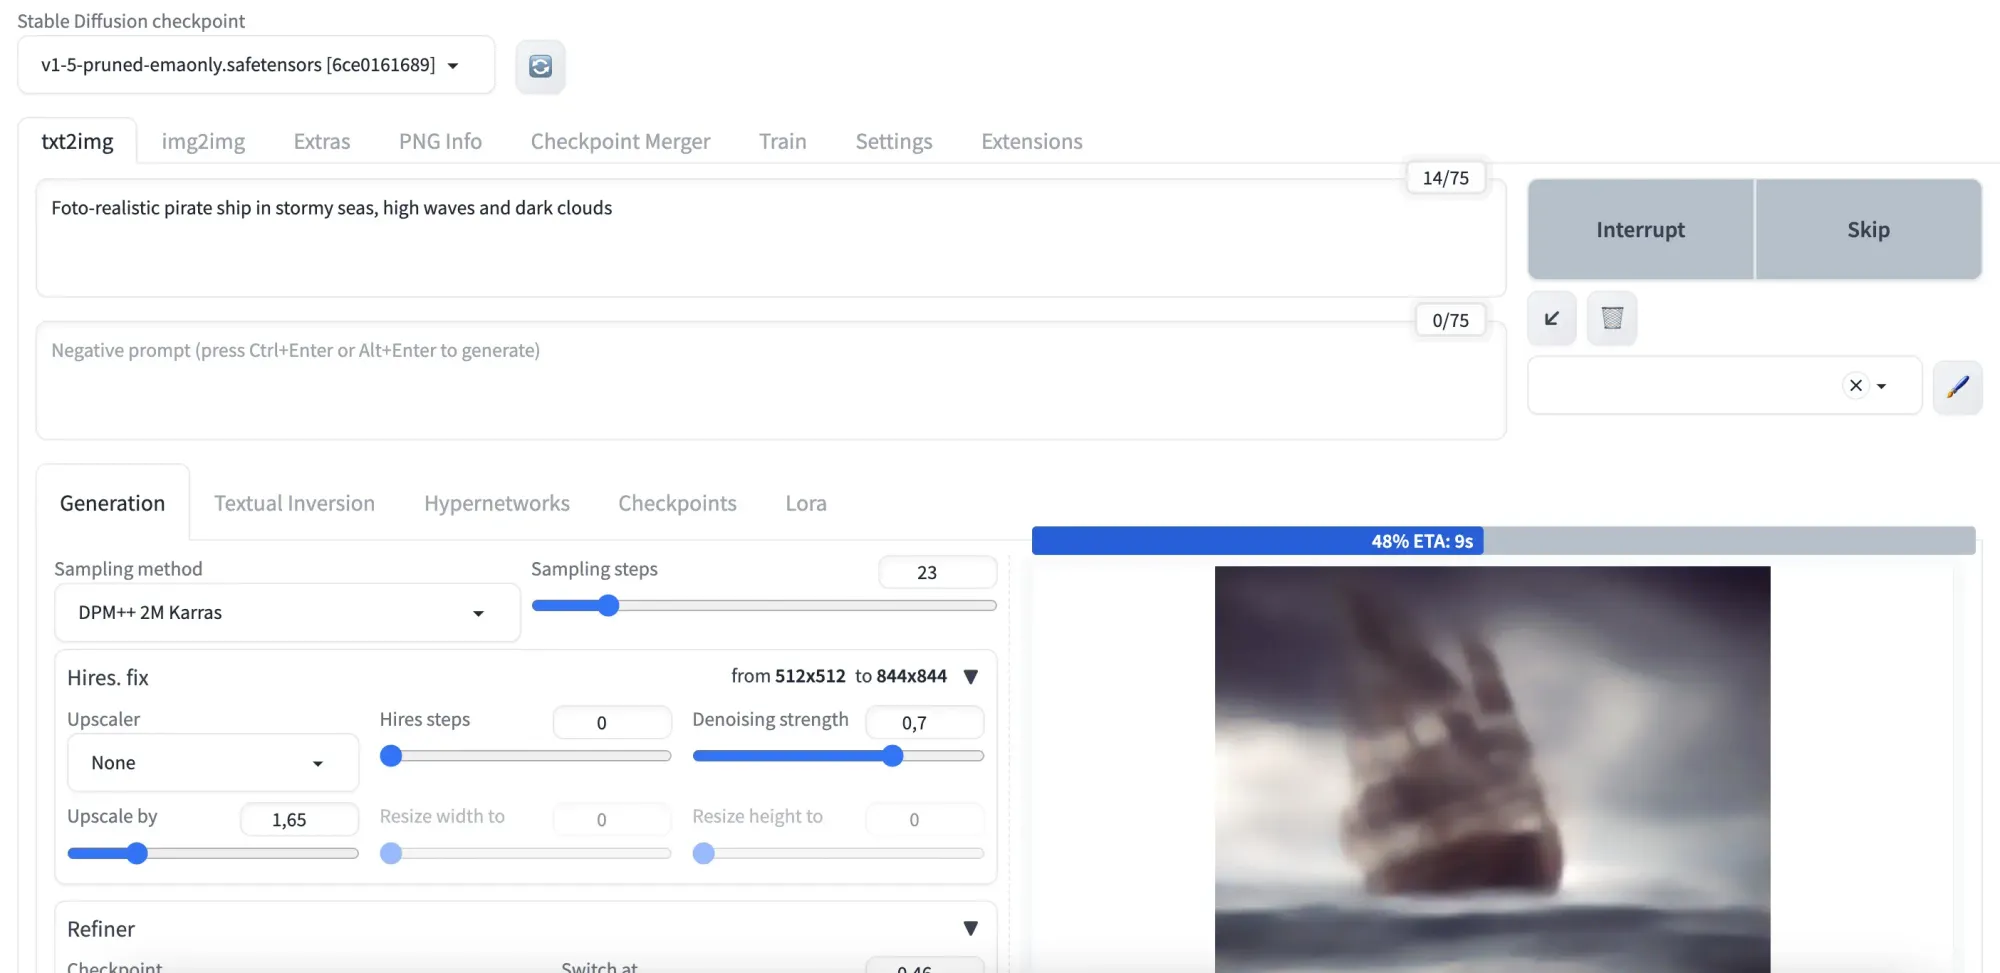
After running the installation (which takes a few minutes) and your run pipeline you should see a WebUI similar to this one.
How to write good text to image prompts
This is the typical way of working with generative image AI. You provide a prompt describing visually what you expect to see in the image and the AI takes the input, tries to find semantically similar images from its training data and merges them into an image.
As you can see there is a wide array of settings available in the webUI and after playing around with it for a bit you will see that results differ dramatically.
Generating usable images from this requires mainly two things:
- A good prompt with relevant context
- Settings appropriate for your use case (there is a trade-off between generation speed & quality - more below)
Let's look at some example prompts first:
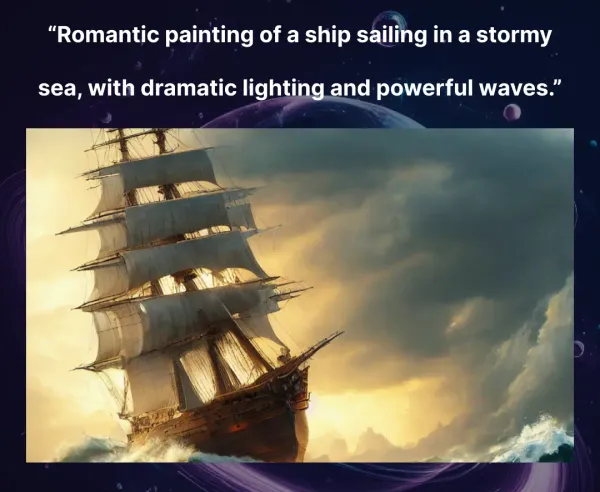
"Romantic painting of a ship sailing in a stormy sea, with dramatic lighting and powerful waves."
This prompt is a good start because it visually describes key features, i.e. what style of image is expected (romantic painting), the main object (ship) and the surrounding with enough detail. Finding the right amount of details can be a bit tricky and might take some practice - in general if you describe clearly and unambiguously what you'd like to see as concise as possible you'll get decent results.
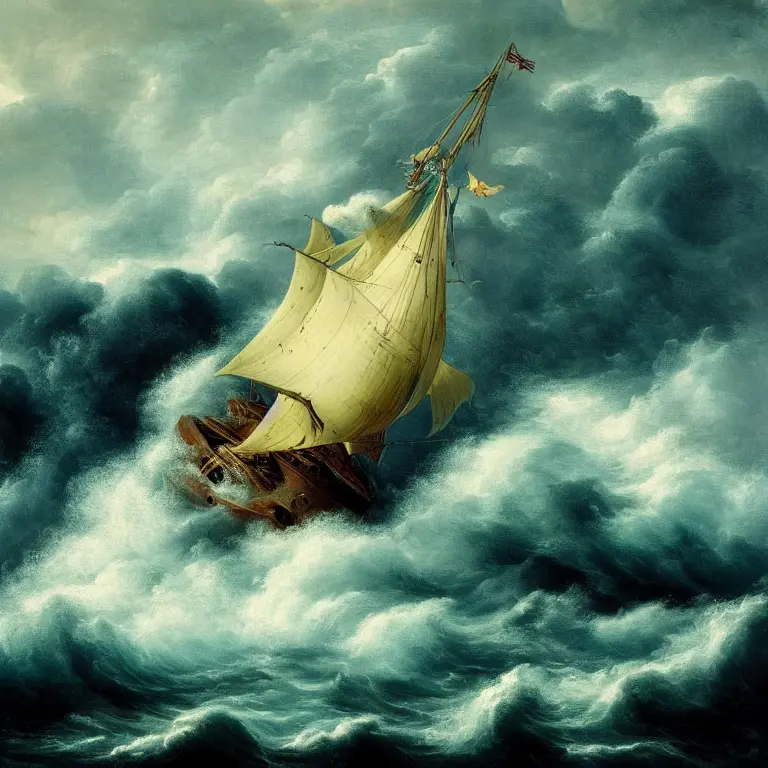
Unfortunately the picture output doesn't have much details yet:
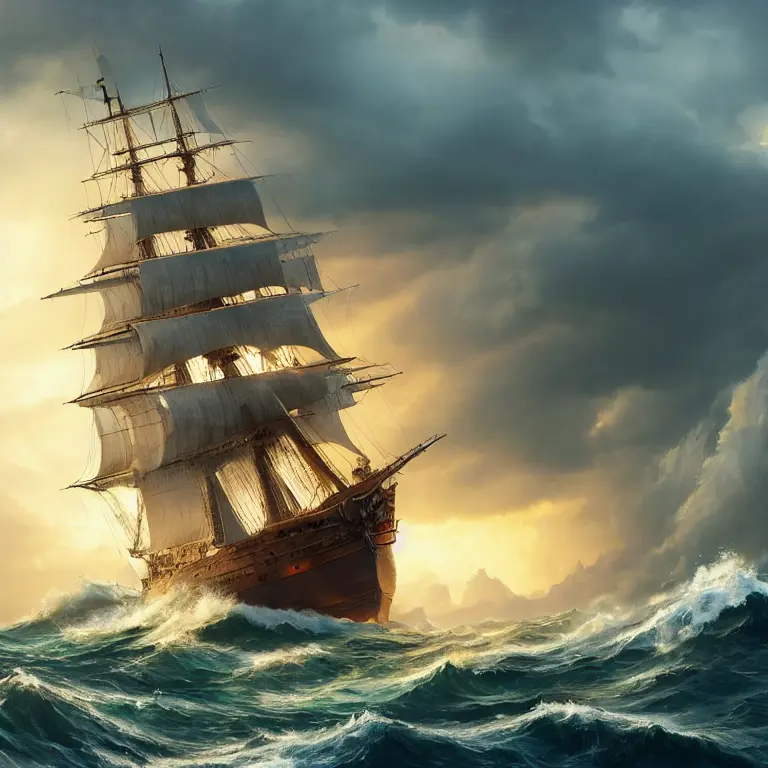
"best quality, masterpiece, (photorealistic:1.4), ship in stormy seas, (powerful waves:1.2), dramatic lighting, hyper quality, intricate detail, ultra realistic, maximum detail, foreground focus, instagram, 8k, volumetric light, cinematic, octane render, uplight, no blur, 8k"
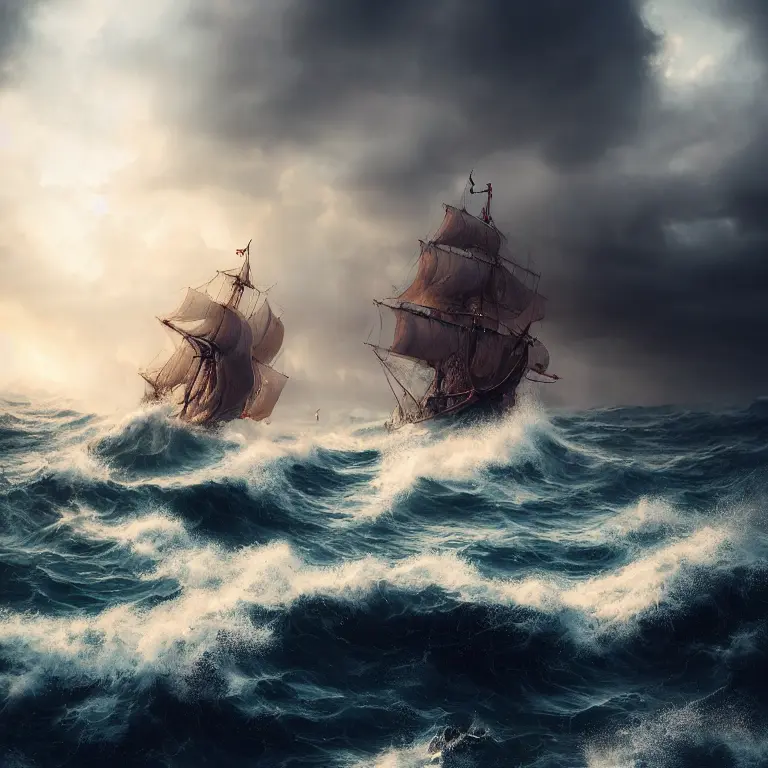
Can we still improve the output? Yes! In order to understand what changed between the first prompt and the second prompt it is helpful to think about how stable diffusion and similar models are trained:
They get millions of labeled images of differing quality, assign patterns & similarity through arranging vector representations of labels and images closer in proximity of each other if similar. Now we can trick the model to only look on a subset of the pictures it was trained on, namely those we associate with beauty. By adding comma separated attributes associated with high quality input (i.e. masterpiece or cinematic) we can improve the output significantly. You can also add weights (i.e. photorealistic:1.4) if you want to prioritize between different attributes.
"best quality, masterpiece, (photorealistic:1.4), ship in stormy seas, (powerful waves:1.2), dramatic lighting, hyper quality, intricate detail, ultra realistic, maximum detail, foreground focus, instagram, 8k, volumetric light, cinematic, octane render, uplight, no blur, 8k"
& negative prompt:
"nsfw, ng_deepnegative_v1_75t,badhandv4, (worst quality:2), (low quality:2), (normal quality:2), lowres,watermark, monochrome"
Another great way to improve an already excellent output image is by specifying attributes and output visual you want to avoid. Your frontend provides a second box for this. By adding quality descriptions like low and normal to the negative prompt we can enforce the ultra high quality even stronger. By adding thing like monochrome & watermark we can enforce more variation in our output.
Text 2 image settings
As mentioned there is a ton of different settings so we will focus on the important ones here:
Sampling method
The default is DPM++ 2M Karras which is a great mix between speed & quality. If you have time and want a bit more detail try switching to DPM++ SDE Karras
Other choices include some that are a lot faster like UniPC at the expense of detail
Hires. fix
This handles the upscaling of your output images. Per default images are 512x512 pixels which is the size of the training images used. You can upscale your images to higher resolution at the cost of speed. I recommend a value between 1.5 and 1.7 anything higher will get critically slow and might even crash the GPU with a out of memory error.
Refiner
This allows you to add a second model that takes the output of the first model and refines it.
What are you going to create with this fascinating new technology?
Zero config cloud made for developers
From GitHub to deployment in under 5 seconds.
Review Faster by spawning fast Preview Environments for every Pull Request.
AB Test anything from individual components to entire user experiences.
Scale globally as easy as you would with serverless but without all the limitations.
