Example Next.js Project in Codesphere - Public Roadmap
Setting up a Next.js app in Codesphere is super easy. Get started for free! This article showcases a public roadmap application with Next.js and SQLite database.
Table of Contents
Next.js is rapidly gaining popularity among web developers. About time to take a look how to set it up in Codesphere.
The use case for today's article will be to build a public roadmap template. We choose things that are useful for us, hoping other startups will also find them useful. This template will be the basis for our own public roadmap.
Goals of the application:
- Show upcoming features on the roadmap
- Show recently released features
- Let users vote on features
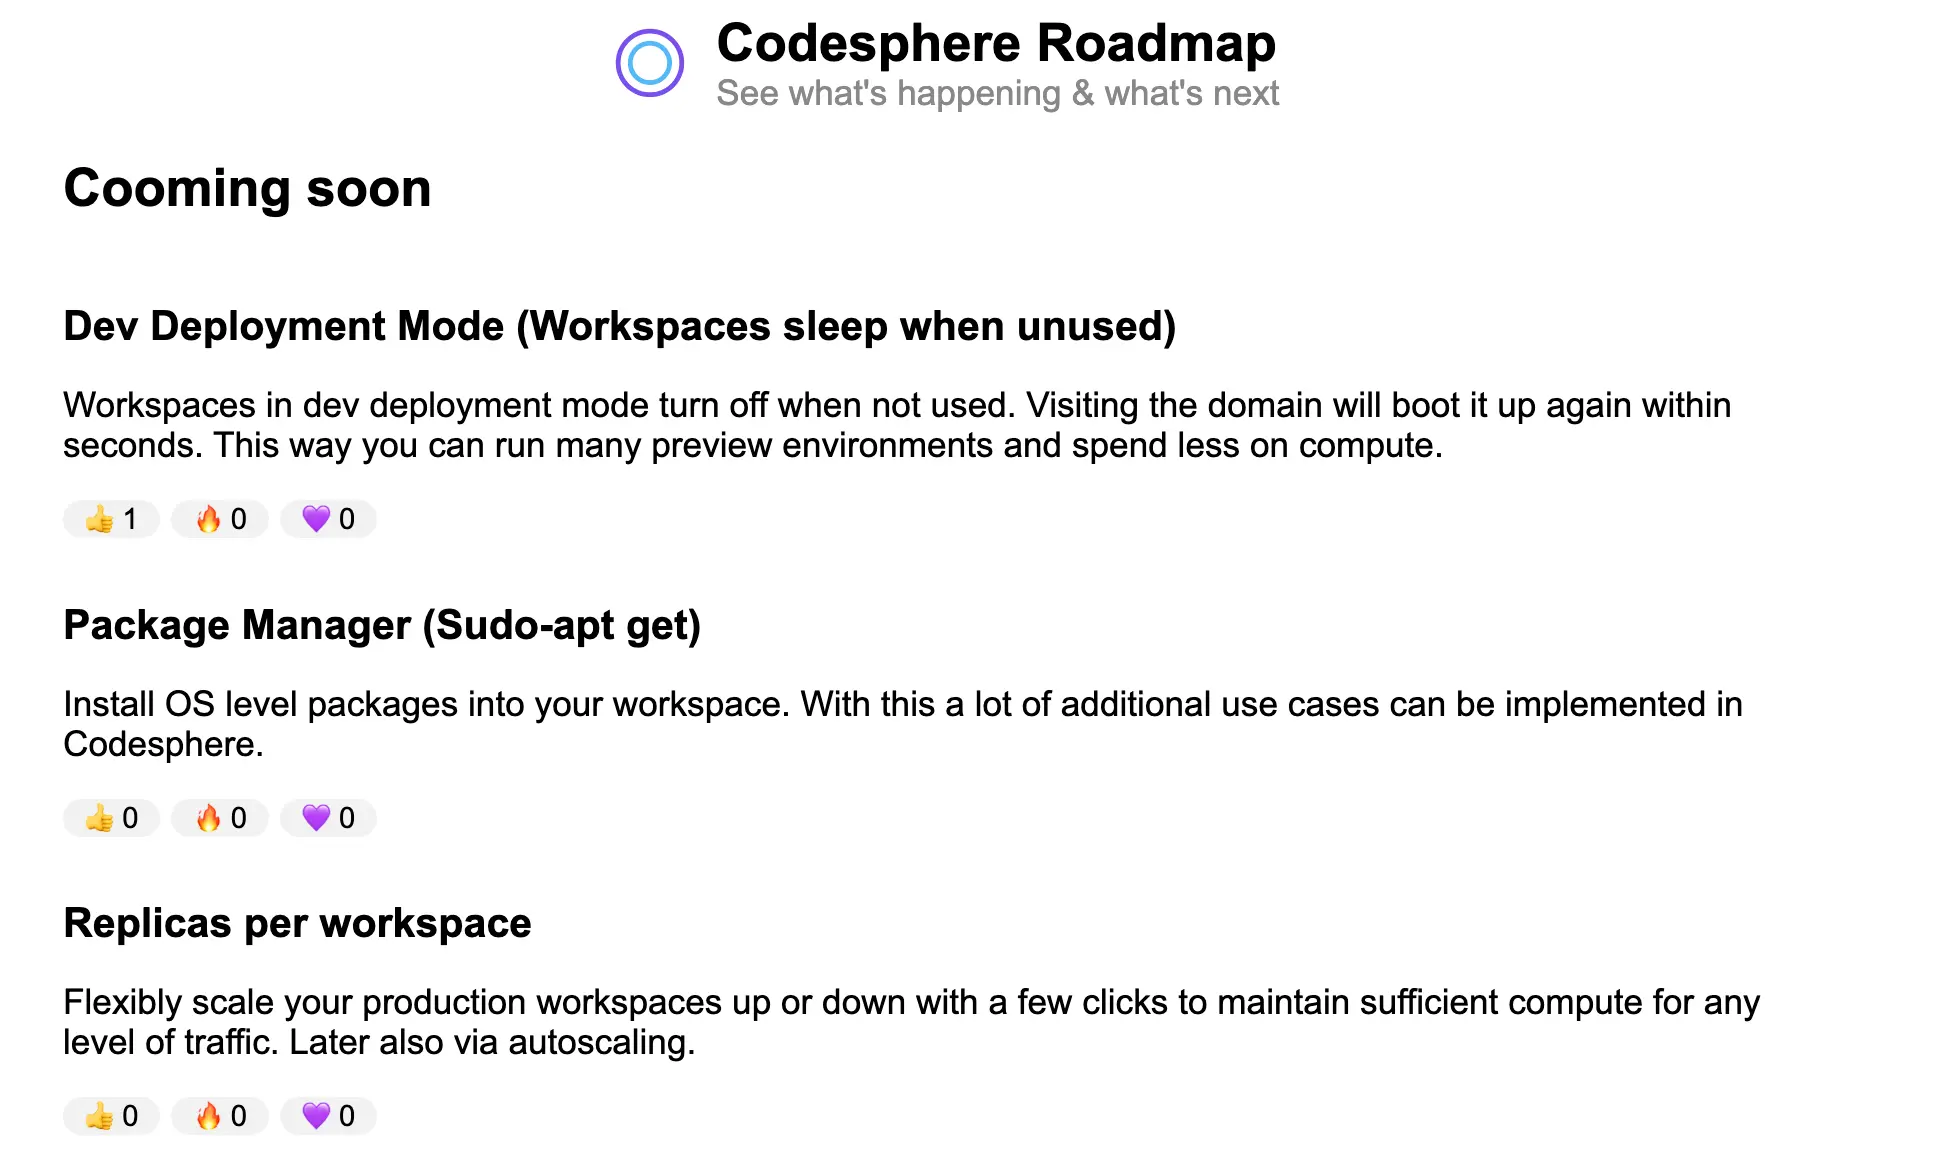
Since we do not intend to run this on a serverless environment, we can make use of Codesphere's containerized infrastructure. We can therefore connect an SQLite database to store our features and the votes, plug that into a bootstrapped Next.js application and build all the logic for handling the votes. We have many tutorials on frontend topics, but today we will focus on the backend using a simple design. This is what the result will look like:
Following along? The easiest way will be to clone the repository locally or in Codesphere via this link: https://codesphere.com/https://github.com/codesphere-cloud/next-js-public-roadmap
To run the development server:
- Run the ci prepare stage (local:
npm install) - Run the ci run stage (local:
npm run dev) - Open the deployment (local: open
localhost:3000)
Currently there is a live preview deployed here: https://41042-3000.2.codesphere.com/
Project Structure
|--public
|--src
|	|--pages
|	|	|--api
|	|--styles
|roadmap.db
The public directory holds our images, under src we have pages with the index.js and a folder api with all the data handling functions. In styles we have a rather simple .css file for basic styling.
At the top level we have the typical next.js config files, a jsconfig.json & a package.json files. We have a ci.yml to configure our Codesphere pipeline and a roadmap.db which stores our data.
Connecting an SQLite & Handling the votes
First make sure to install sqlite and sqlite3. If you cloned the repository running npm install will take care of all that.
In _app.js we first need to make sure we initalize our SQLite database properly:
import "@/styles/globals.css";
import { open } from "sqlite";
import sqlite3 from "sqlite3";

export default function App({ Component, pageProps }) {
  return <Component {...pageProps} />;
}

export async function getServerSideProps() {
  const db = await open({
    filename: "./roadmap.db",
    driver: sqlite3.Database,
  });

  return {
    props: {
      db,
    },
  };
}
Next we need to embed a serialised version of the db into the html layout. This is done via _document.js:
import { Html, Head, Main, NextScript } from "next/document";


export default function Document({ db }) {
  return (
    <Html lang="en">
      <Head />
      <body>
        <Main />
        <NextScript />
        <script
          dangerouslySetInnerHTML={{
            __html: `window.db = ${JSON.stringify(db)};`,
          }}
        />
      </body>
    </Html>
  );
}
In the api folder, we have two files, the first is roadmap.js. This file connects to the database. It sets up tables if needed. It retrieves a list of items for the roadmap and shipped items using SQL queries.
import sqlite3 from "sqlite3";
import { open } from "sqlite";

export default async function handler(req, res) {
  if (req.method === "GET") {
    const db = await open({
      filename: "./roadmap.db",
      driver: sqlite3.Database,
    });
    await db.all(
      `
      CREATE TABLE IF NOT EXISTS roadmap (
        id INTEGER PRIMARY KEY AUTOINCREMENT,
        title TEXT NOT NULL,
        description TEXT NOT NULL,
        status TEXT NOT NULL,
        upvotes INT NOT NULL DEFAULT 0,
        fires INT NOT NULL DEFAULT 0,
        hearts INT NOT NULL DEFAULT 0
      );
      `
    );


    const roadmapItems = await db.all("SELECT * FROM roadmap WHERE status = 'planned'");
    const shippedItems = await db.all("SELECT * FROM roadmap WHERE status = 'released'");


    res.status(200).json({'roadmapItems': roadmapItems, 'shippedItems': shippedItems});
  } else {
    res.status(405).json({ message: "Method Not Allowed" });
  }
}
The second api is called upvote.js. It updates the vote counts for an item in the database using the item id and column name.
import sqlite3 from "sqlite3";
import { open } from "sqlite";

export default async function handler(req, res) {
  if (req.method === "POST") {
    const id = req.body.id;
    const column = req.body.column;


    const db = await open({
      filename: "./roadmap.db",
      driver: sqlite3.Database,
    });

    const statement = await db.prepare(
      'UPDATE roadmap SET ' + column + ' = ' + column + ' + 1 WHERE id = ' + id
    );
    await statement.run();
    await statement.finalize();

    const updatedItem = await db.get("SELECT * FROM roadmap WHERE id = ?", id);

    res.status(200).json({ id: updatedItem.id, upvotes: updatedItem.upvotes, fires: updatedItem.fires, hearts: updatedItem.hearts });
  } else {
    res.status(405).json({ message: "Method Not Allowed" });
  }
}
The index.js puts it all together. We fetch and post data updates via our apis into useState elements. Based on the fetched data we update the state of the elements in the frontend.
Then we use a .map() call to build the html code for each item.
import Head from "next/head";
import { useEffect, useState } from "react";

export default function Home() {
  const [roadmapItems, setRoadmapItems] = useState([]);
  const [shippedItems, setShippedItems] = useState([]);

  // Fetch roadmap items
  useEffect(() => {
    fetch("/api/roadmap")
      .then((response) => response.json())
      .then((data) => setRoadmapItems(data.roadmapItems));
  }, []);
  // Fetch recently shipped items
  useEffect(() => {
    fetch("/api/roadmap")
      .then((response) => response.json())
      .then((data) => setShippedItems(data.shippedItems));
  }, []);

  const handleUpvote = (id, column, clicked_id) => {
    fetch("/api/upvote", {
      method: "POST",
      body: JSON.stringify({ 'id': id , 'column': column}),
      headers: {
        "Content-Type": "application/json",
        Accept: 'application/json',
      },
    })
      .then((response) => response.json())
      .then((data) => {
        // handle voting for roadmap items
        const updatedRoadmapItems = roadmapItems.map((item) => {
          if (item.id === data.id) {
            return { ...item, upvotes: data.upvotes, fires: data.fires, hearts: data.hearts};
          }
          return item;
        });
        setRoadmapItems(updatedRoadmapItems);
        // handle voting for shipped items
        const updatedShippedItems = shippedItems.map((item) => {
          if (item.id === data.id) {
            return { ...item, upvotes: data.upvotes, fires: data.fires, hearts: data.hearts};
          }
          return item;
        });
        setShippedItems(updatedShippedItems);
        document.getElementById(clicked_id).disabled = true;
      });
  };

  return (
    <>
      <Head>
        <title>Codesphere Roadmap</title>

      </Head>
      <main>
        <div class="roadmap">
        <div class="header">
              <img class="logo"  src="/logo-codesphere.png" alt="Company Logo"></img>
              <div>
                <div class="headline">Codesphere Roadmap</div>
                <div class="subheadline">See what's happening & what's next</div>
              </div>
        </div>
        <h2>Cooming soon</h2>
        <div>
          {roadmapItems.map((item) => (
            <div key={item.id} class="feature">
              <h3>{item.title}</h3>
              <p>{item.description}</p>
              <div class="voting-array">
                <button
                  id={"upvote_"+item.id}
                  className="upvote-button"
                  onClick={() => handleUpvote(item.id, 'upvotes', 'upvote_'+item.id)}
                >
                  👍 {item.upvotes}
                </button>
                <button
                  id={"fire_"+item.id}
                  className="upvote-button"
                  onClick={() => handleUpvote(item.id, 'fires', 'fire_'+item.id)}
                >
                  🔥 {item.fires}
                </button>
                <button
                  id={"heart_"+item.id}
                  className="upvote-button"
                  onClick={() => handleUpvote(item.id, 'hearts', 'heart_'+item.id)}
                >
                  💜 {item.hearts}
                </button>
              </div>
            </div>
          ))}
        </div>
        <h2>Recently released</h2>

        <div>
          {shippedItems.map((item) => (
            <div key={item.id} class="feature">
              <h3>{item.title}</h3>
              <p>{item.description}</p>
              <div class="voting-array">
                <button
                  id={"upvote_"+item.id}
                  className="upvote-button"
                  onClick={() => handleUpvote(item.id, 'upvotes', 'upvote_'+item.id)}
                >
                  👍 {item.upvotes}
                </button>
                <button
                  id={"fire_"+item.id}
                  className="upvote-button"
                  onClick={() => handleUpvote(item.id, 'fires', 'fire_'+item.id)}
                >
                  🔥 {item.fires}
                </button>
                <button
                  id={"heart_"+item.id}
                  className="upvote-button"
                  onClick={() => handleUpvote(item.id, 'hearts', 'heart_'+item.id)}
                >
                  💜 {item.hearts}
                </button>
              </div>
            </div>
          ))}
        </div>

        </div>
      </main>
    </>
  );
}
Working with the database
This tutorial is already long, so we didn't create an admin panel to edit the database's features and define voting options. The repository contains a sample SQL query for creating a feature entry. To see items in your app, add them to either the 'released' or 'planned' stati when querying.
-- SQLite
INSERT INTO roadmap (id, title, description, status, upvotes, fires, hearts)
VALUES (8,'Create workspaces from public GitHub URLs','Instantly create workspaces directly from public GitHub URLs. Simply append the repository URL like this: https://codesphere.com/https://github.com/codesphere-cloud/large-language-example-app', 'released',0,0,0);
Locally you can run these queries via an SQLite plugin of your IDE. Codesphere comes with an SQL database explorer built in. You need to initalize it in the UI once via Setup -> Databases -> New Database -> roadmap -> continue

Make sure to replace ROADMAP with your actual db name. Afterwards you can access the database explorer via Setup -> Databases -> SQLite -> your db name

That's it - you now have a next.js app you can use to share your public roadmap with your users.
No third party services needed & 100% customisable. Hosting it can be as little as 5$/m and super easy in Codesphere. If you havn't check it out here: codesphere.com
We will add some extra colors and a link for suggesting new features to our version. How will you customize your version? 💜😎
